- Usage
- Adding New Alerts
- Alerts Settings – Notifications
- Alerts Settings – Triggers
- Exporting Alerts
- Alerts History
Usage
With the Alerts page you can set up SMS, email, or webhook notifications that are triggered by different type of system events.
Types of Alerts
- Call History: Triggers will send notifications for call history events such as missed, transferred, or voicemail calls. Triggers can be applied to specific hunt groups, queues, phone numbers, lines, etc.
- SIP Registration: Triggers will send notifications for user phone line SIP registration events – phone going online, offline, or rewews its registering with the server.
- SMS: Send notifications for a user SMS activity.
Owned/All Alerts Lists and Alerts Role Permissions
The Alerts page is accessed from the side navigation menu and will show your Owned Alerts (alerts assigned to you) and All Alerts (assigned to or created by other users).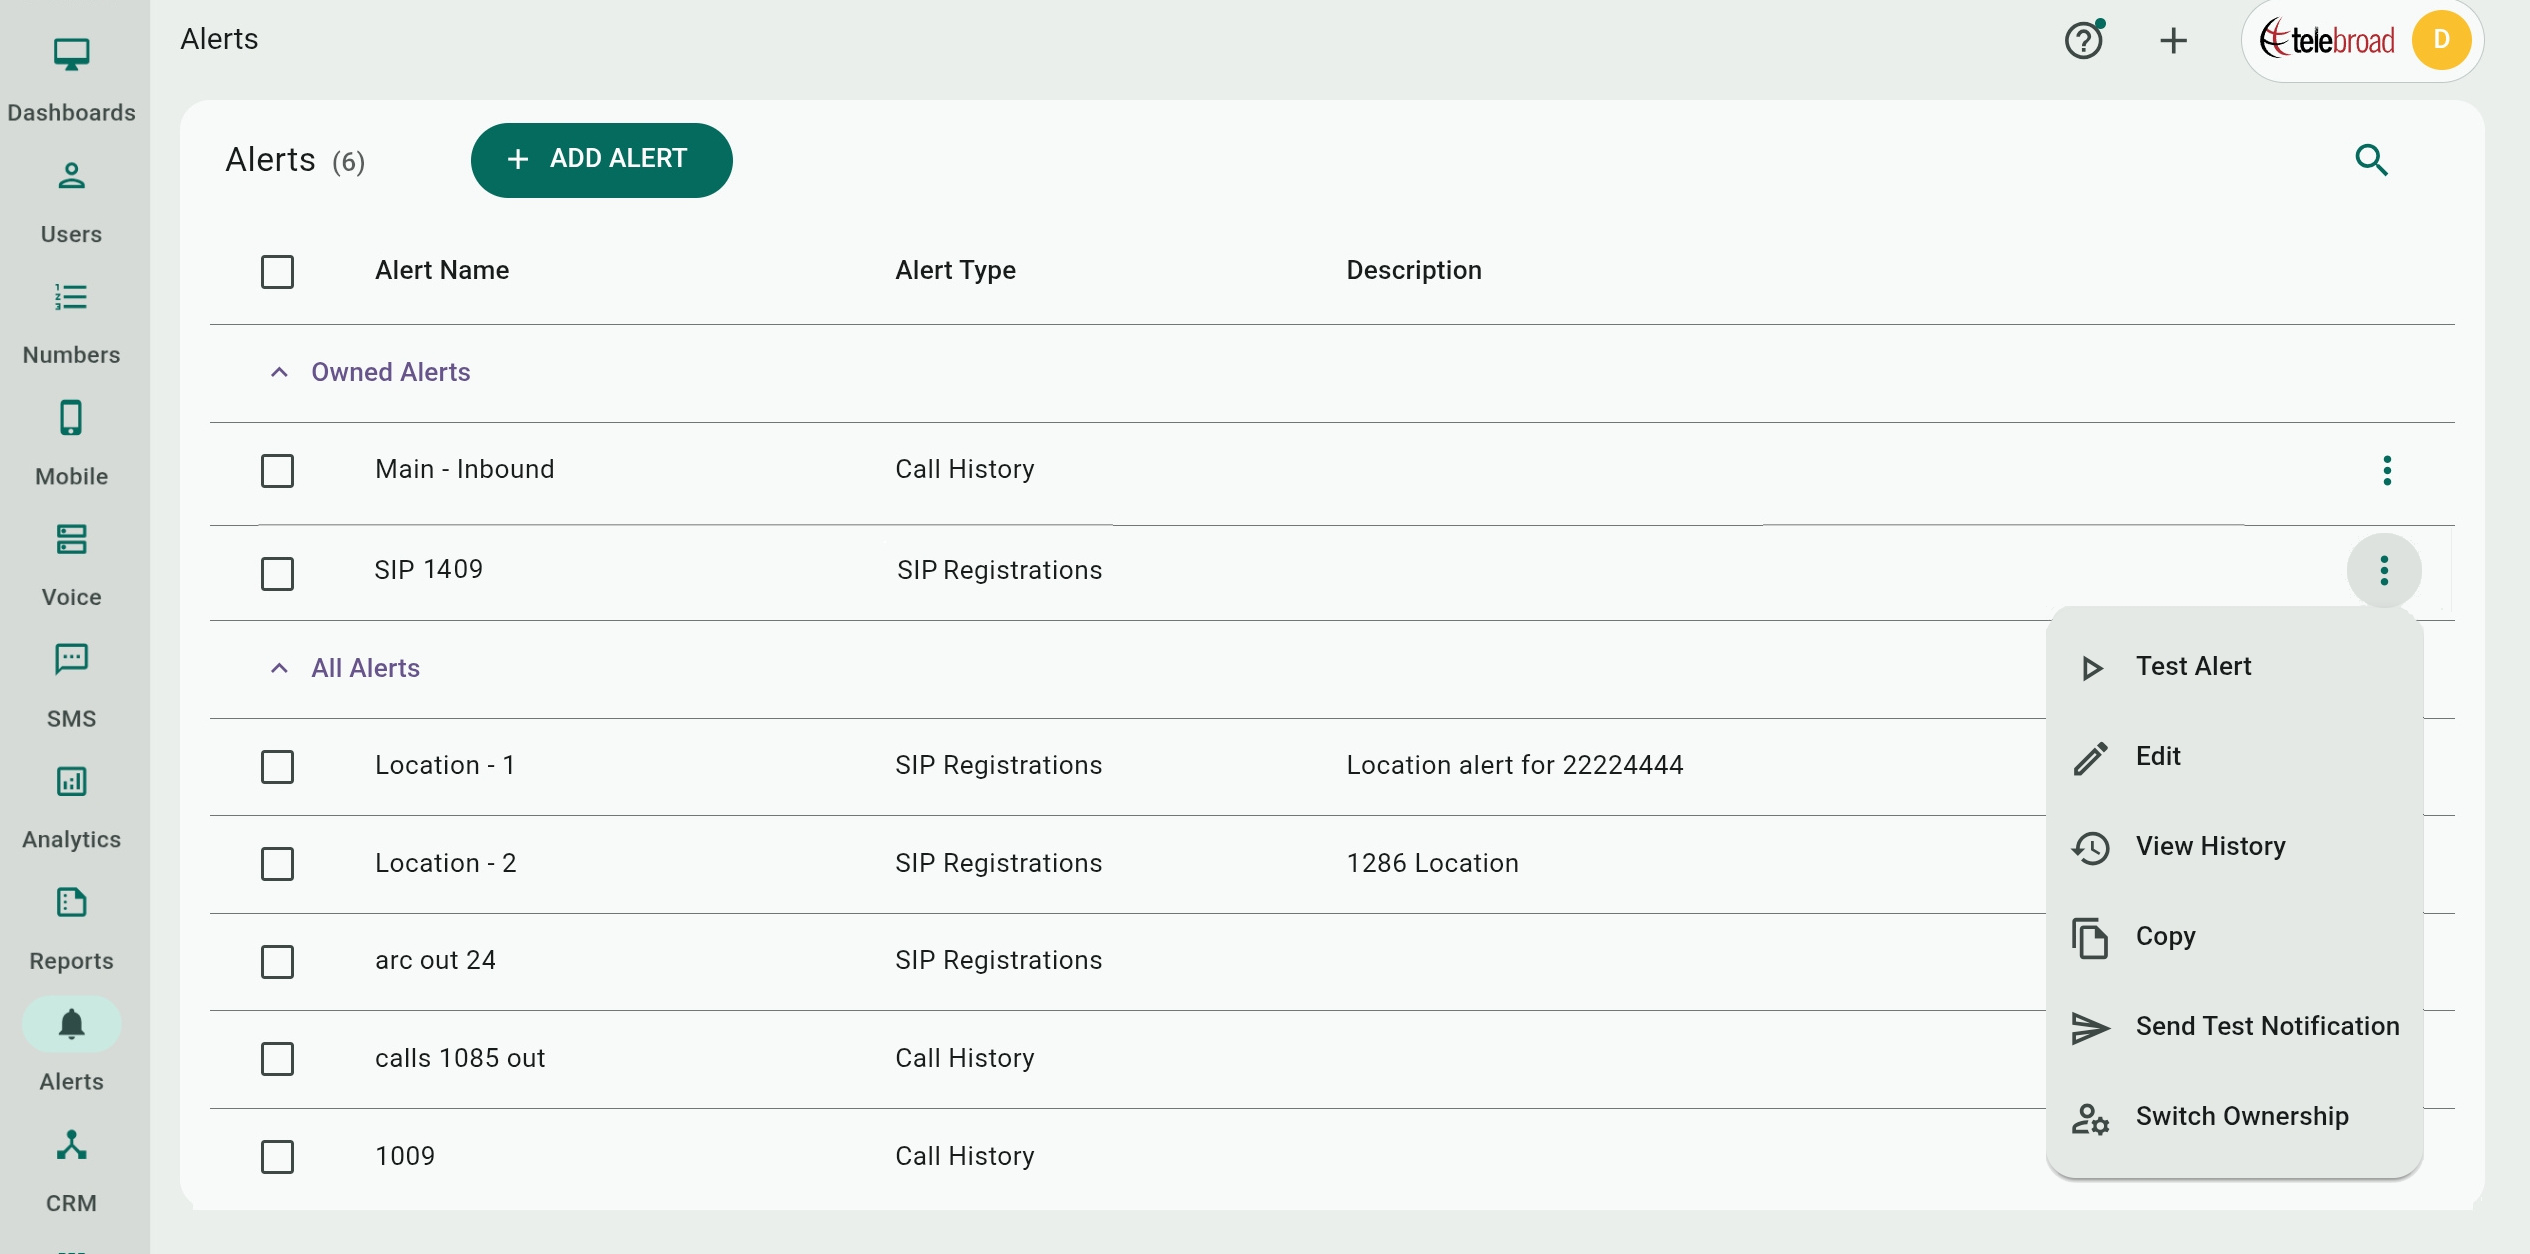
Viewing and deleting alerts in the All Alerts list is available to Account Owners or users who have a role with Alerts>All Alerts view permissions. To also edit other users' alerts, the user must have full Data Permissions (All Users, Phone Numbers, Hunt Groups, and Call Queues). Roles are explained here.

Alerts Options
The mini-menu for each alert has options to Test Alert, Edit the alert (you can also edit by selecting the alert), View history (discussed below), Copy duplicates the alert, or Switch Ownership to assign ownership to a different user.
Adding New Alerts
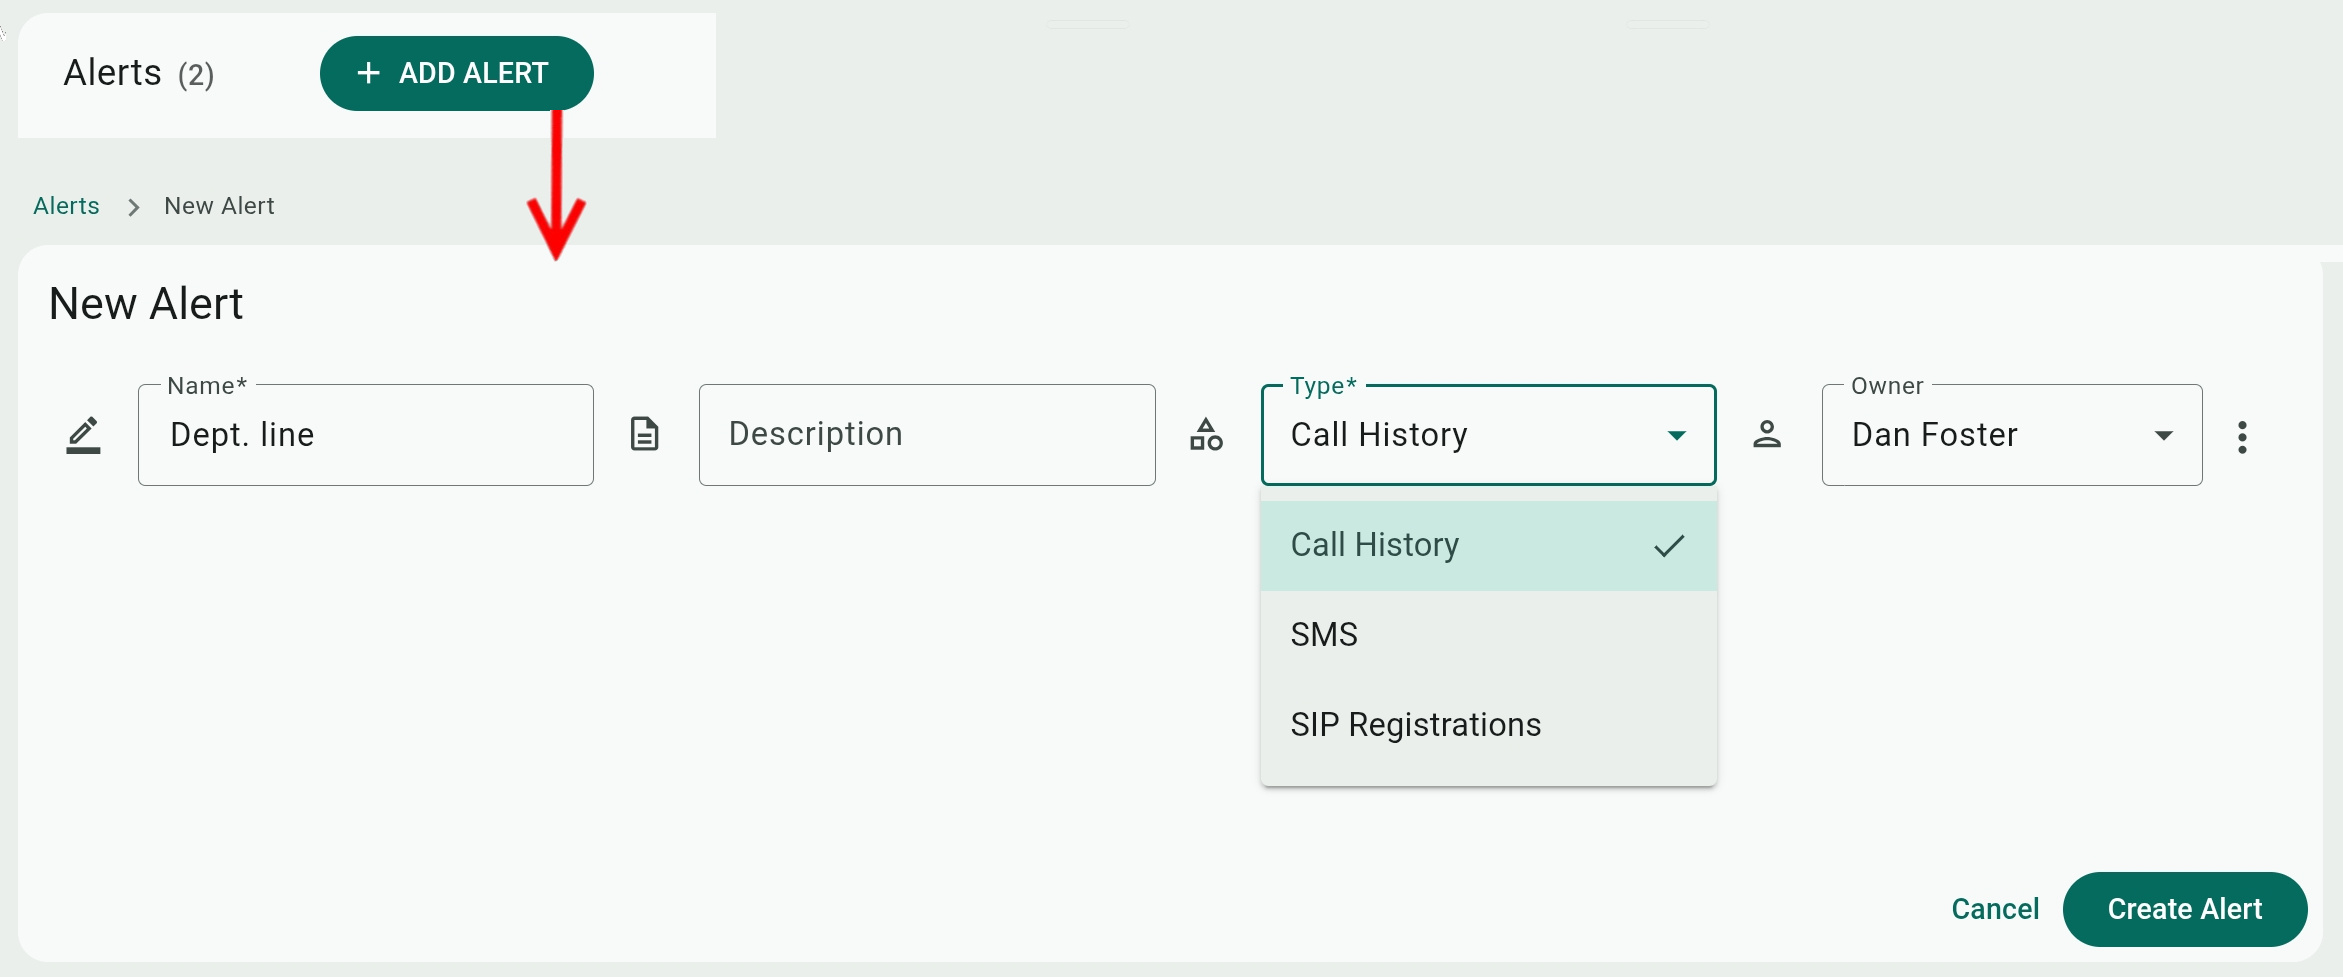
Click Add Alert, provide the alert's Name and Description (optional), and select Call History, SMS, or SIP Registration for the alert Type (explained above)
For the alert's Owner, selecting yourself will place the alert in your Owned Alerts list, while selecting any other user will place it in the All Alerts list.
Once you click Create Alert, the Alert Type cannot be modified. To change it, delete the alert and add it again. You can export the alert for reference and be able to copy its parameters.
Alerts Settings – Notifications
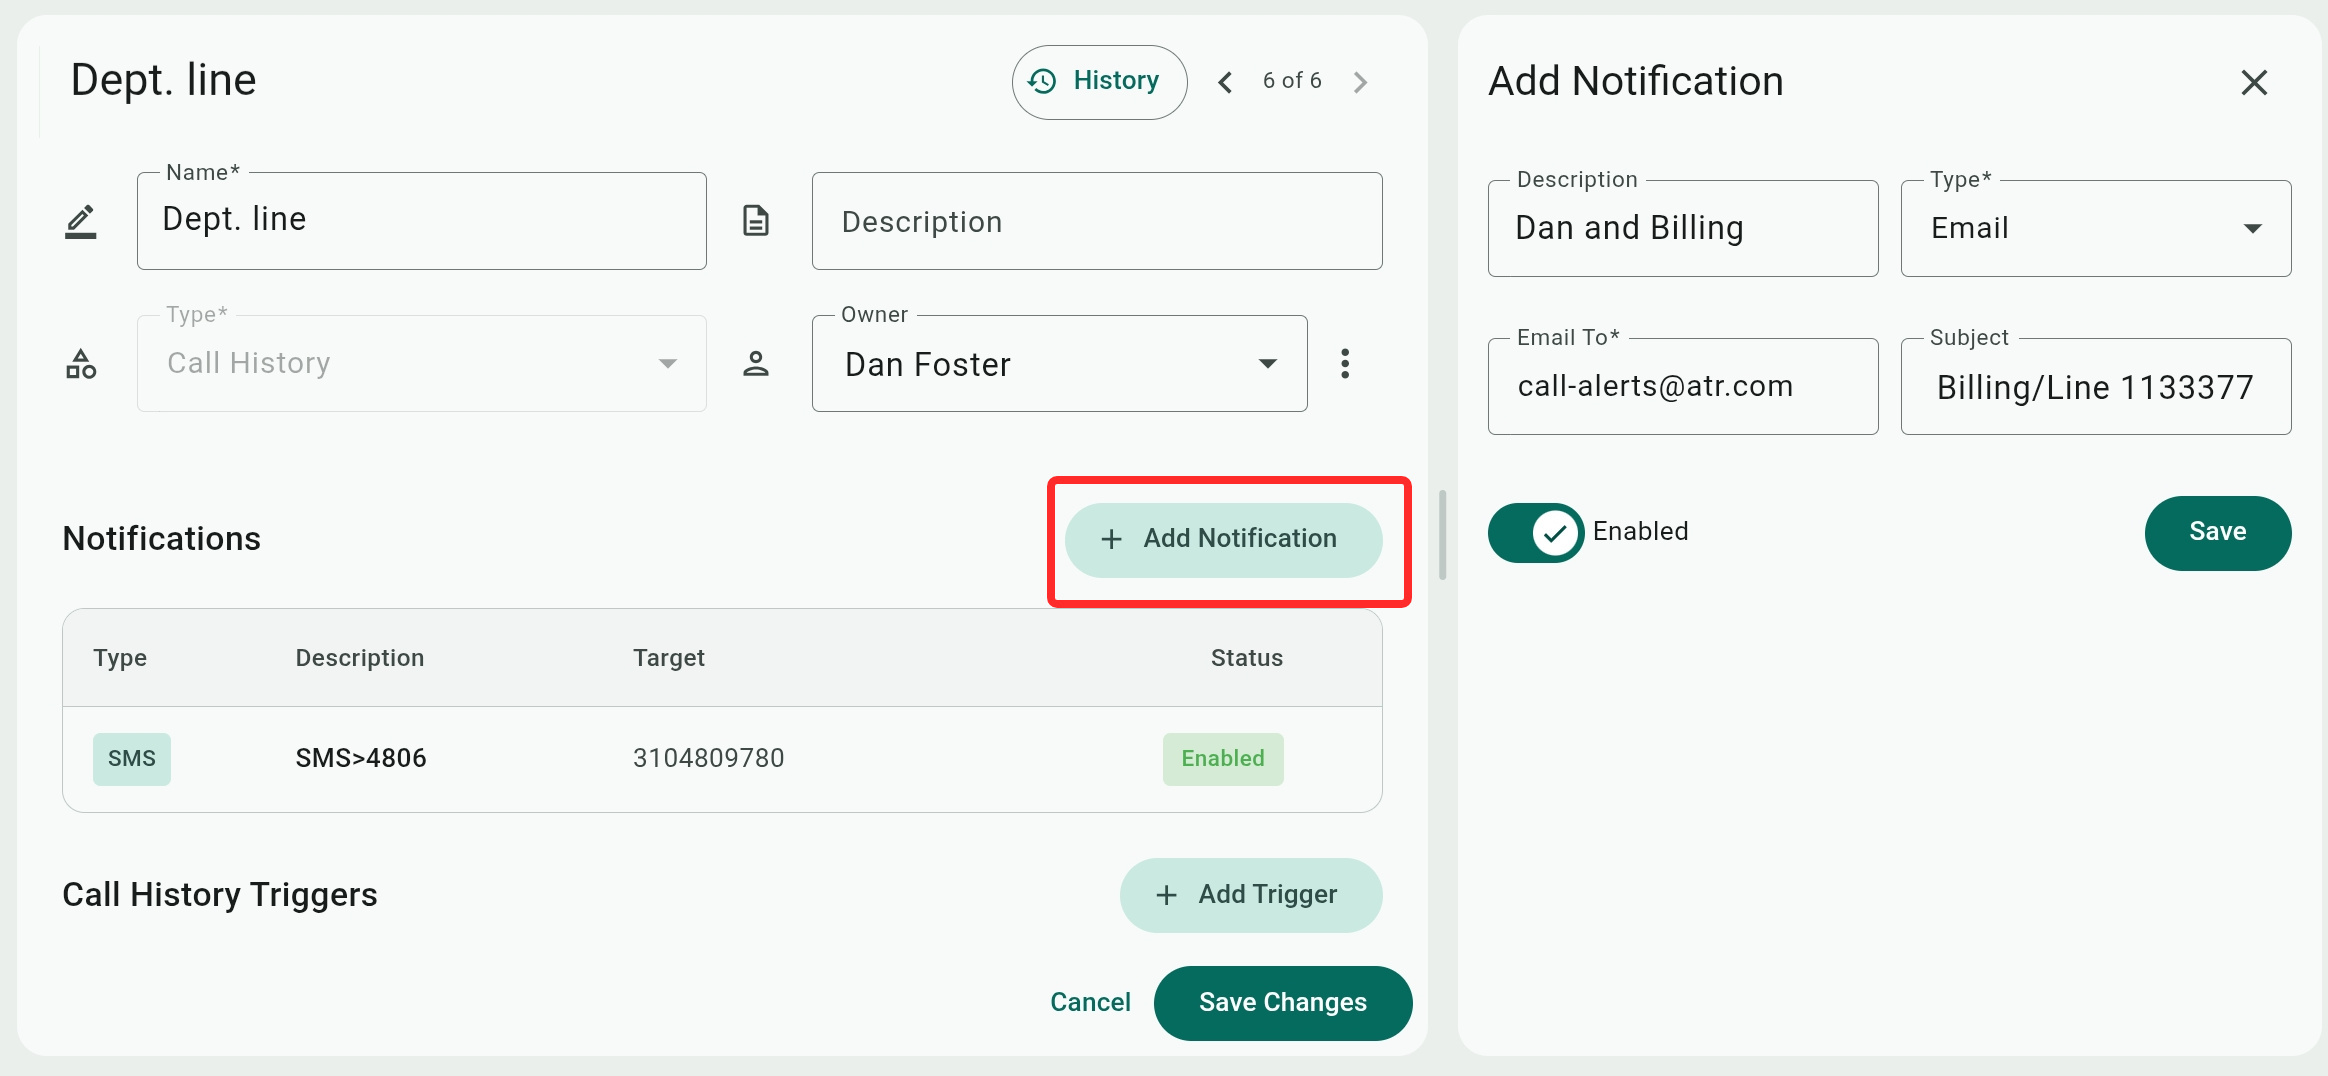
Select a newly added or existing alert to configure its notifications.
You can send alert notifications to different channels as specified in the Type menu. Available channels include email, SMS, and Webhook.
After you save a new notification, you cannot change its type and can only delete it. To delete a notification, tap to the right of its status to show the deletion icon, or instead you can select the notifications and toggle off its Enabled option.

Email Notifications
For email notifications, you just need to provide the recipient's address ("Email to") and the Subject line.
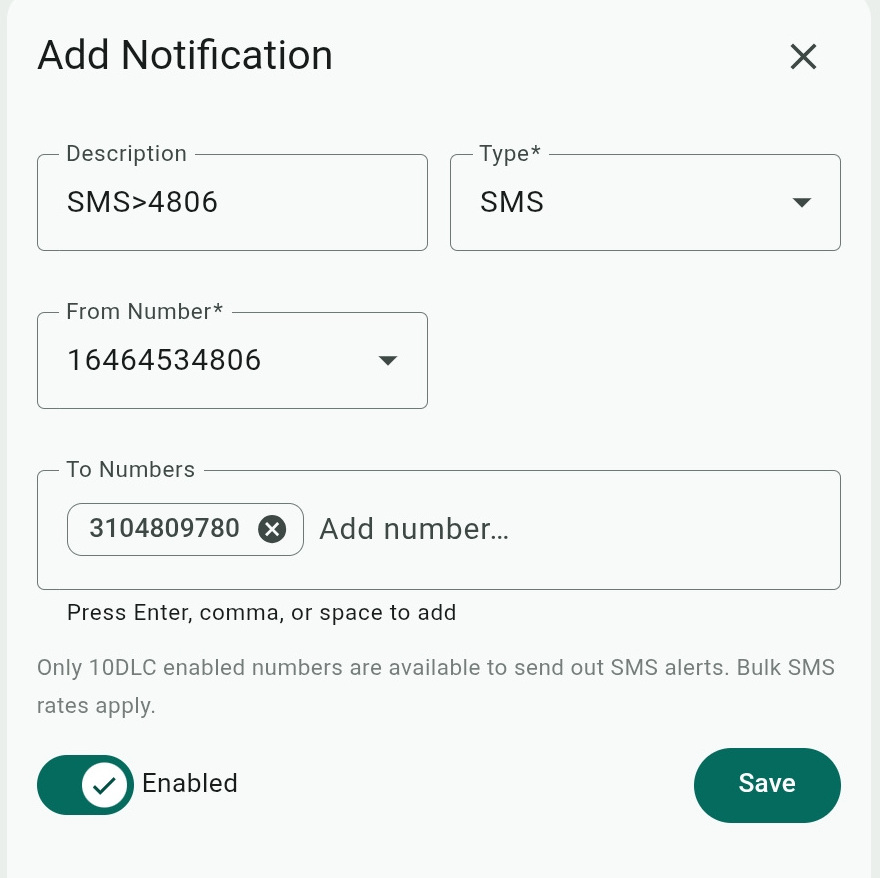
SMS Notifications
For SMS notifications, you need to select an SMS enabled number the (the From Number field) to deliver the SMS messages from.
You can add multiple recipients in the To Numbers, but note that bulk rates apply.
Webhook Notifications
Webhook notifications allow you to generate simplified API requests for finished calls, and have their data processed by an external app or server. Webhooks are explained in more detail in this article discussing webhook integrations.
- Webhook URL: The web address of the external server that will handle the API request.
- Method: The communication method to handle the payload.
- The Post method is the most common and will send the payload data to the receiving server.
- The Put method updates resources on the receiving server.
Both of these carry their data in the body of the request. - The Get method, however, appends the data to the URL as a query string and is less secure because the data is visible. Its data size is limited by the URL length and it is suitable for simpler notifications.
- The Post method is the most common and will send the payload data to the receiving server.
- Headers: You can add these additional value-pairs (Header name and Value), as needed, to the API request to inform the receiving server about authentication or other parameters.
The choice of authentication header would depend on the receiving app or server.- Bearer Token and X-API-Key: Are both unique string of characters that authenticate the request and give it access to the server.
- Basic Auth: A simple Username/Password combination that authenticates the request and gives it access to the server.
- Custom Header: Any additional custom values you want to send with the request.
- Bearer Token and X-API-Key: Are both unique string of characters that authenticate the request and give it access to the server.
Example Request: This will change depending on your Method selection. It shows you an example of the data and parameters sent in the body of the API request for processing by your script on the receiving server.
Alerts Settings – Triggers
Triggers define events for which the system sends alerts. Trigger parameters depend on the alert type.
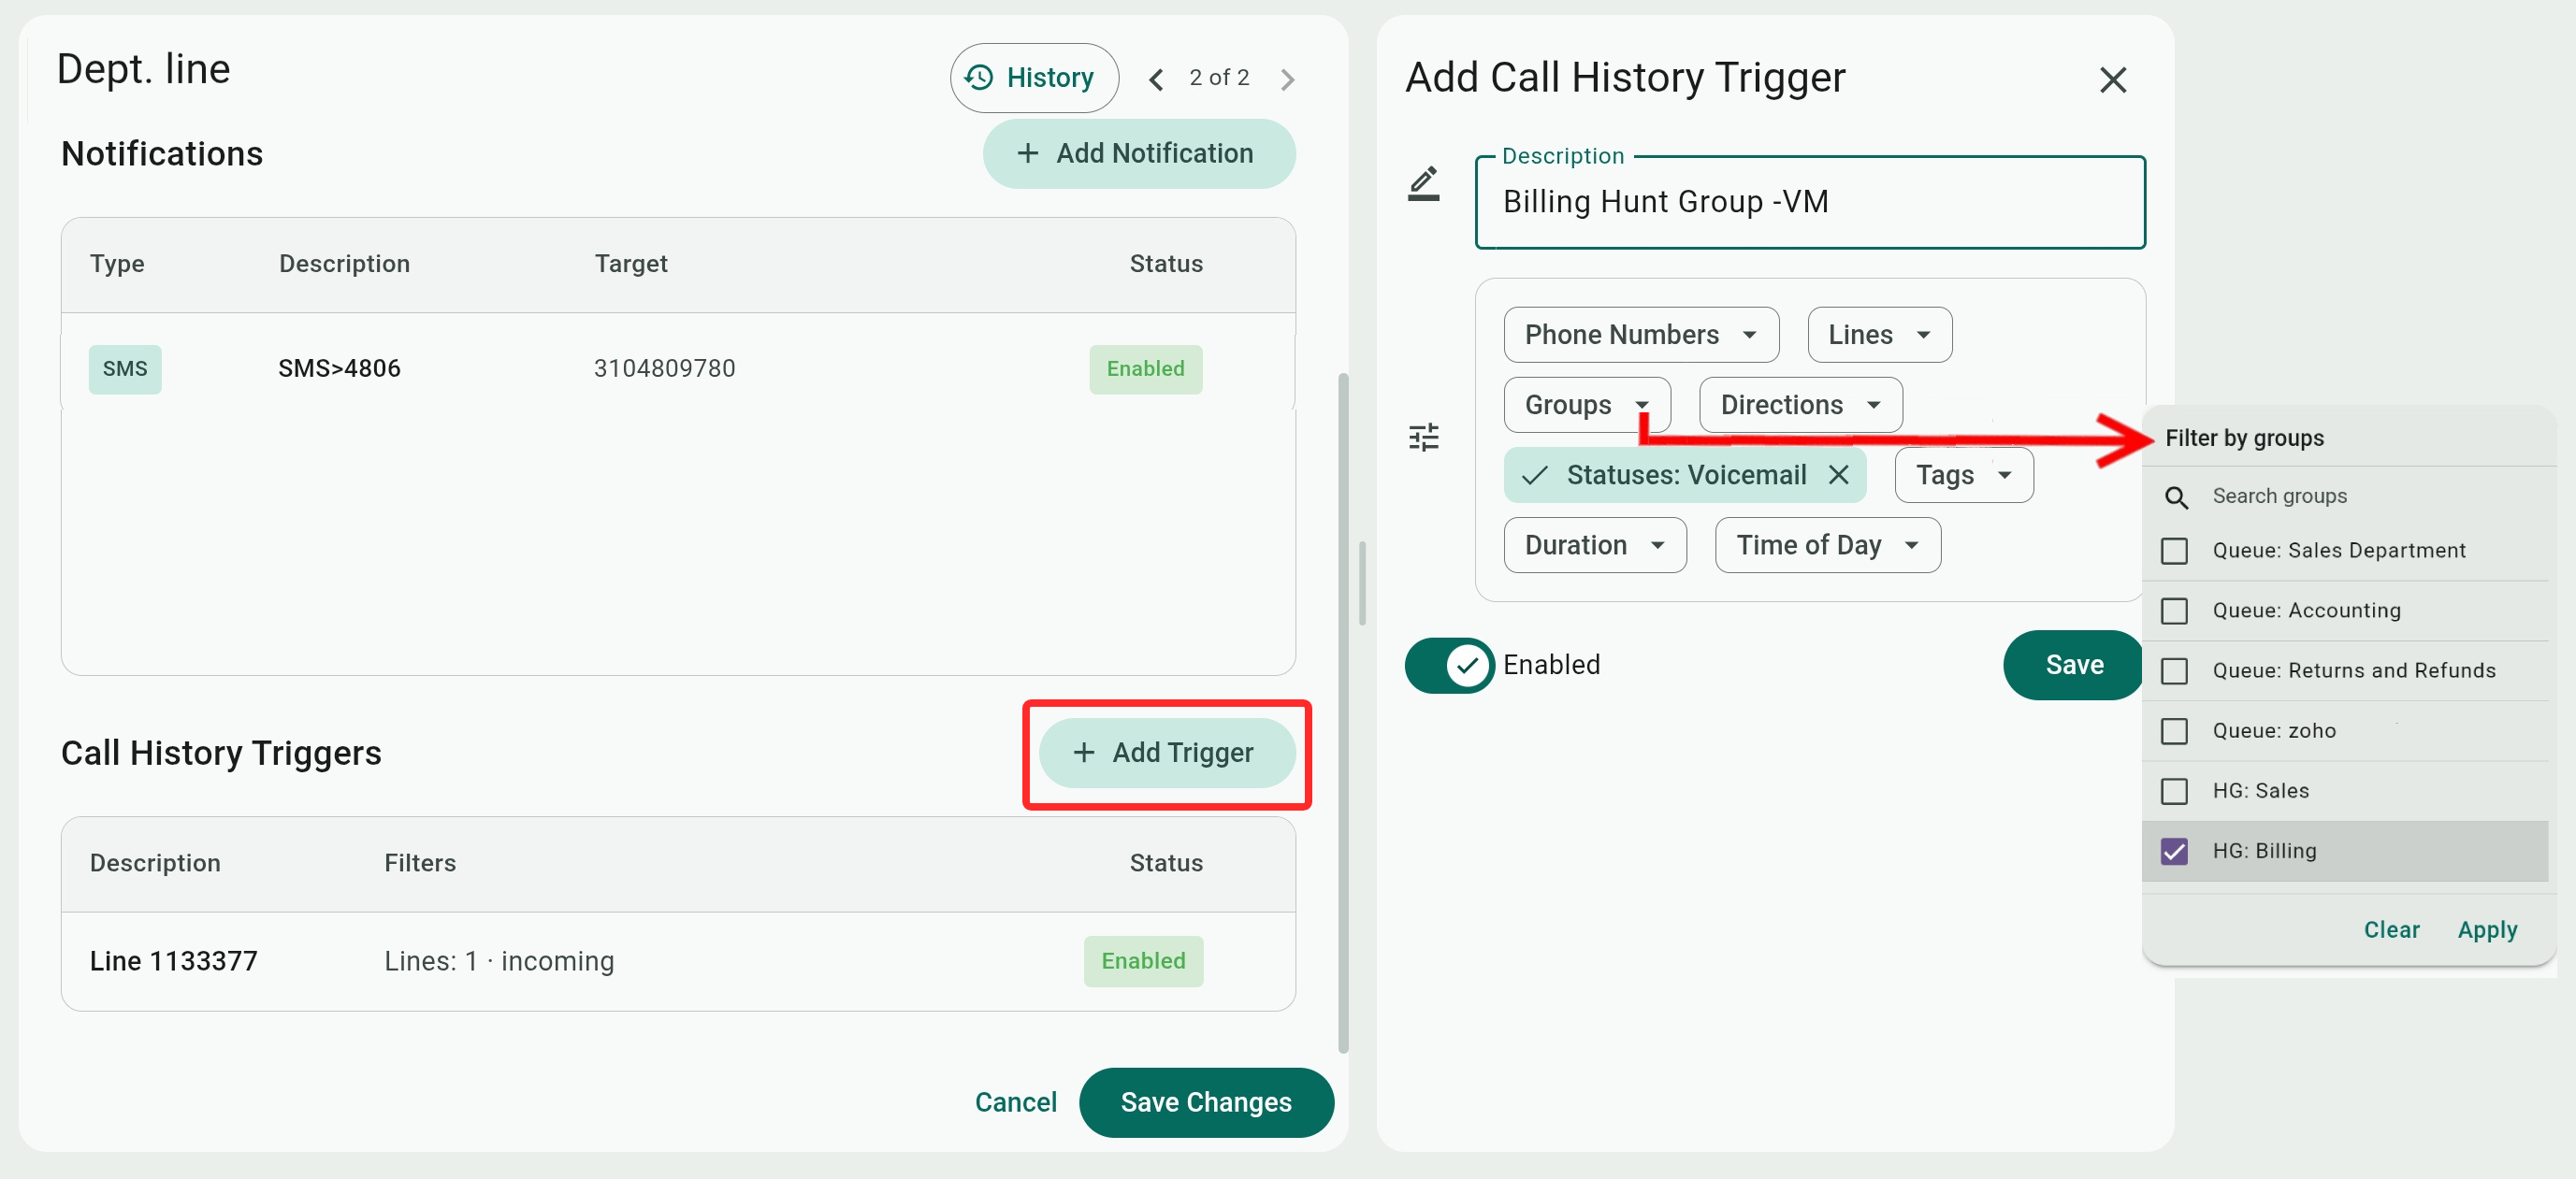
Call History Triggers
For call history triggers, you select from a list of filters – Phone Numbers, Lines, Groups (Hunt Groups or Call Queues), Directions (Incoming, Outgoing, or Internal), Tags (tag filters are covered in this call history report article), call Duration, and Time of Day.
Any time a call matches all of the selected filter criteria, an alert will be sent.
SIP Registration Triggers
Select the triggering Line(s) for the alert and select if the alert gets sent when the line Register (phone comes online), the line Unregister (phone goes offline), or when the line Refresh (phone renews registration).

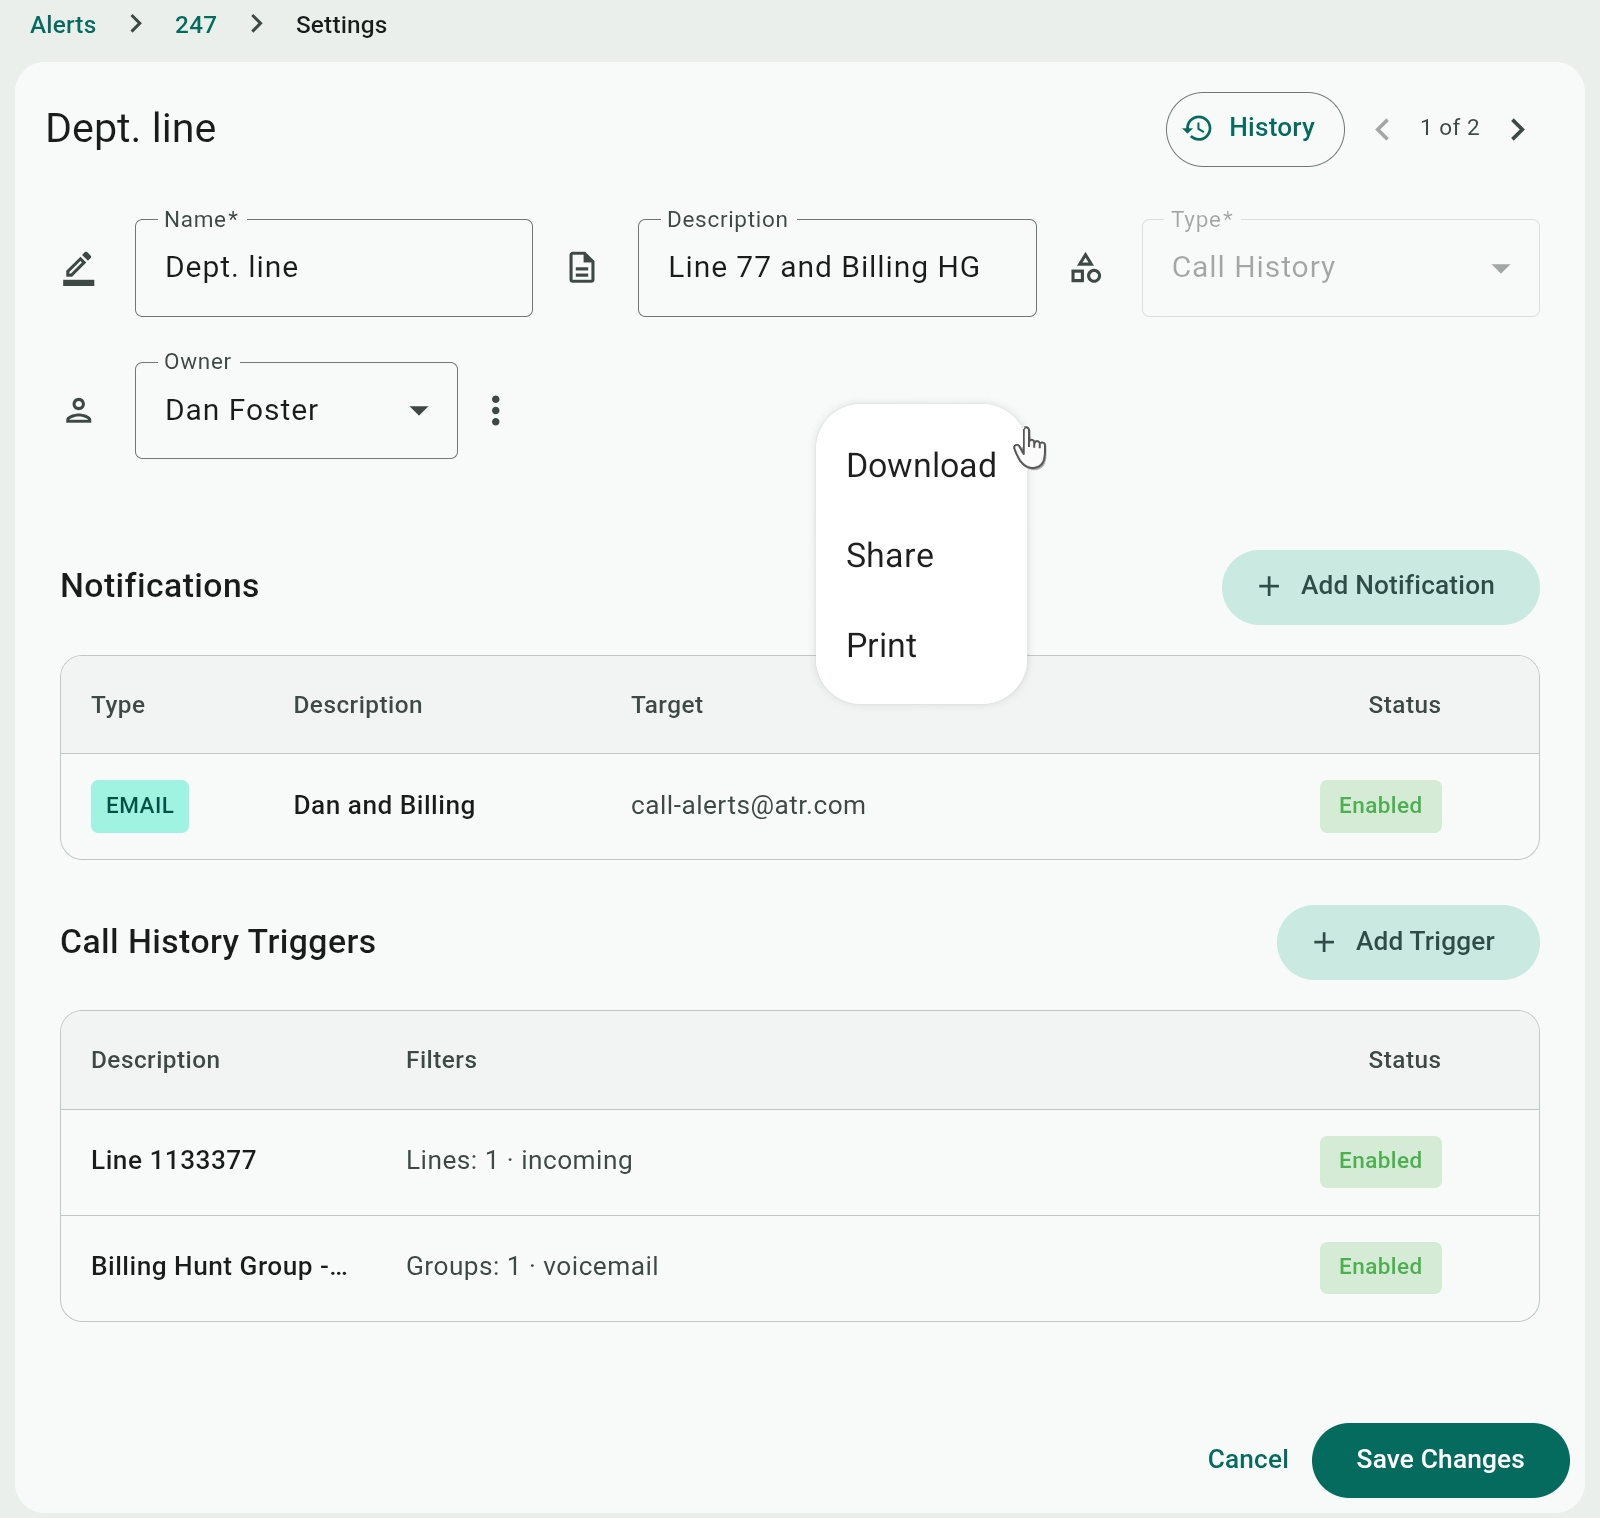
Exporting Alerts
Existing alert settings can be exported for reference or sharing with other users by opening the alert, right-clicking (or long-tapping) anywhere on the screen, and selecting to:
- Download a MHT archive file of the alert that can be opened locally and lets you copy any of its parameters.
- Share a URL of the alert's settings. The sharing option depends on your OS and installed apps. The recipient needs to have an Admin Center role that permits them to view the All Alerts list.
- Print a diagram of the alert. The print dialog on your system will usually also allow you to save the diagram as a PDF file.
Alerts History
An Alert history can be viewed by selecting it and clicking the History button or by selecting View History from an alert mini-menu on the main page.
An alert history will show all the SMS or email messages sent for all triggering events, and you can filter the results by Date Range, Channel (SMS or Email), and Status (Failed or Success to deliver the alert), or the recipient's SMS or Email.
For SIP Registration alerts there is also a Phone/Extension (phone lines) filter, and for Call History alerts there is also an Entity filter (the same as the trigger's description). Basically, both filters let you select to show results for specific trigger(s).
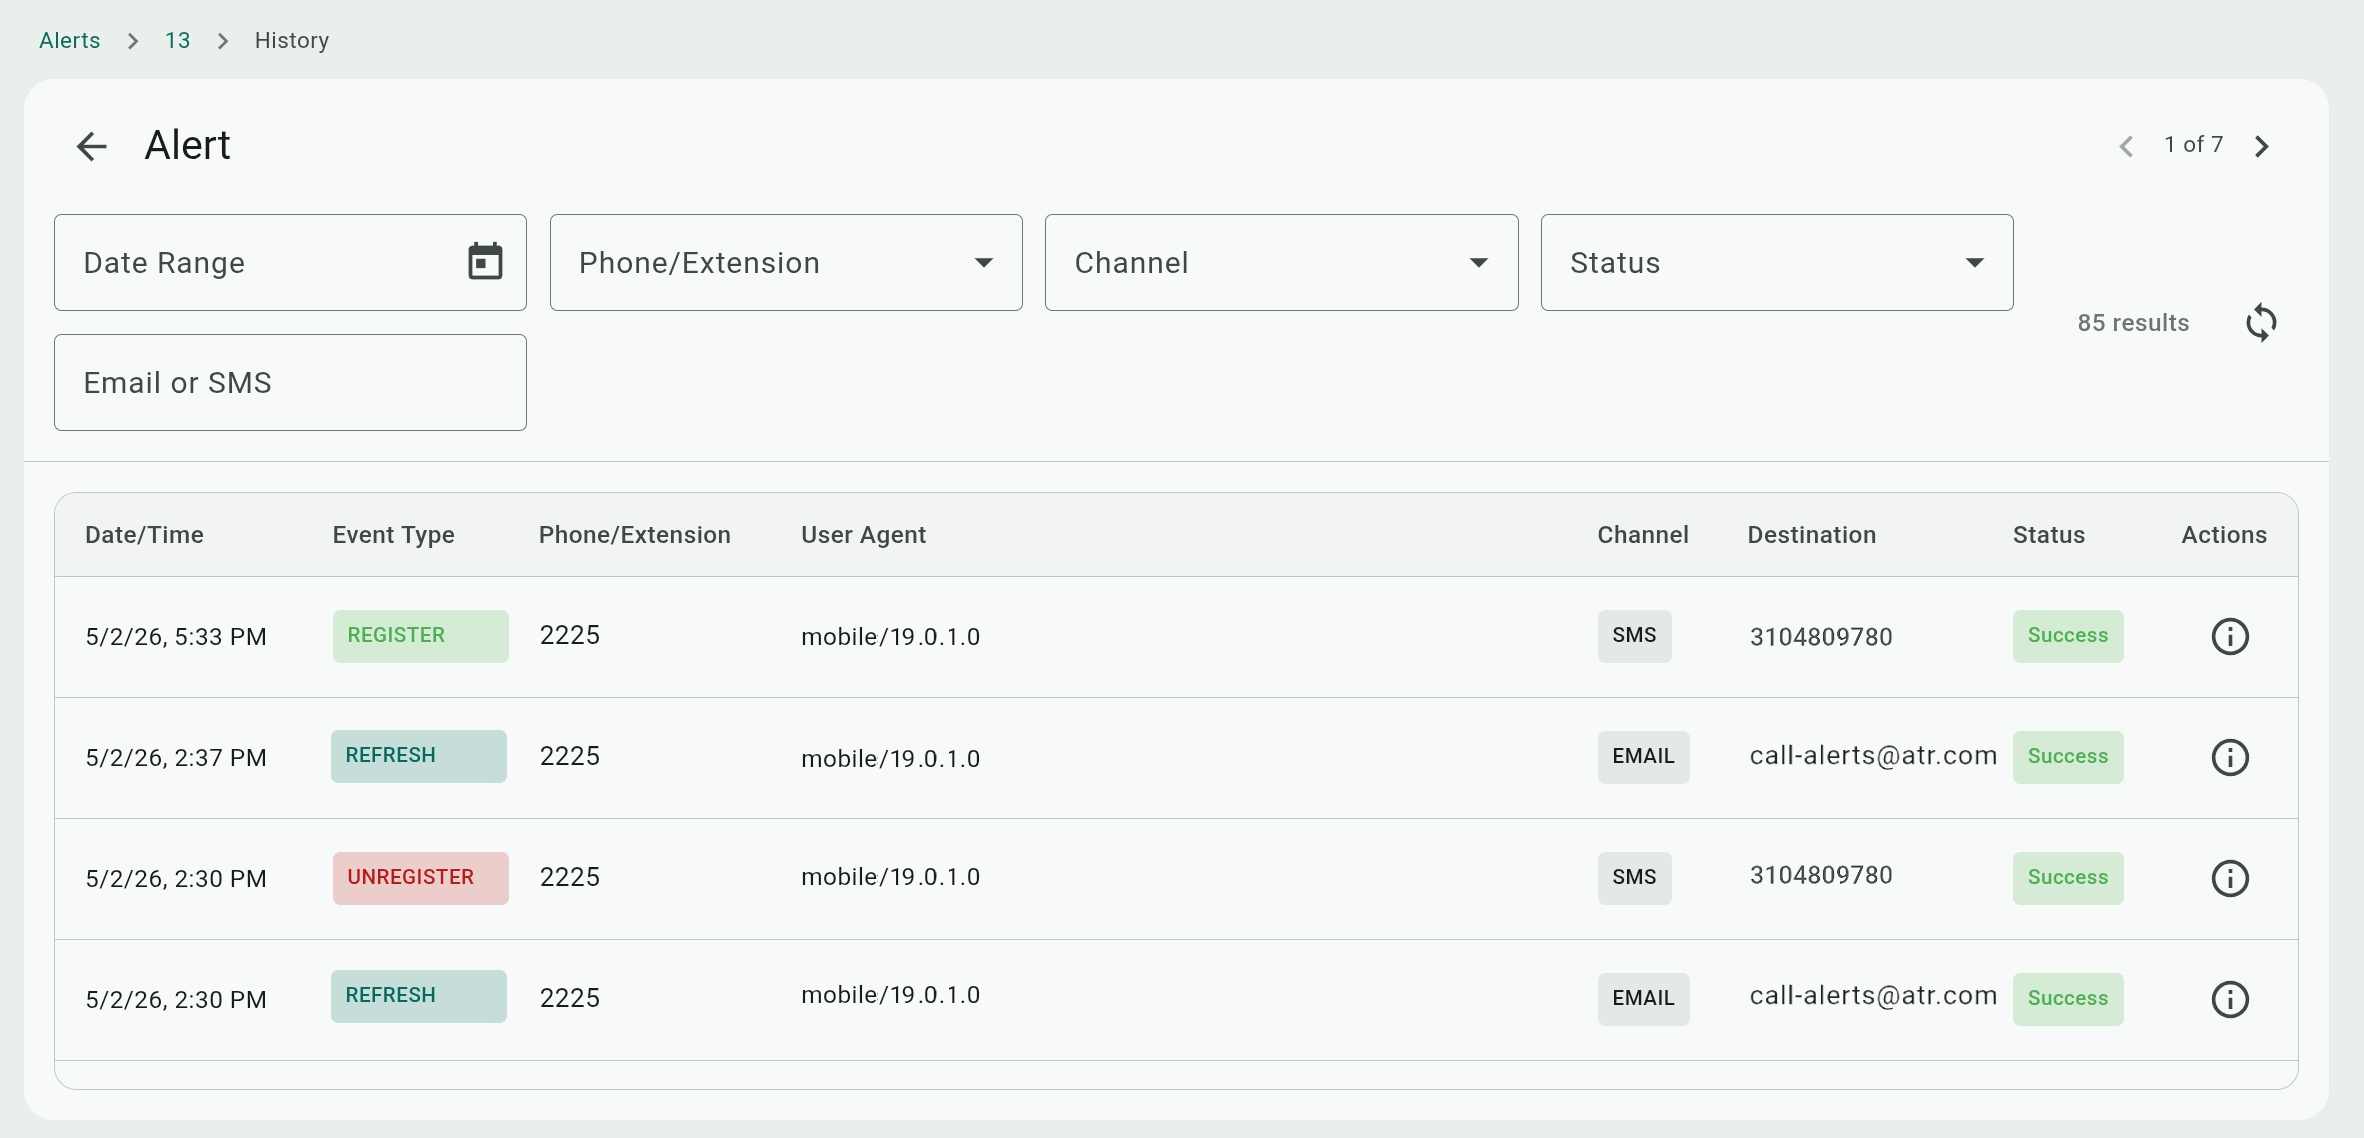
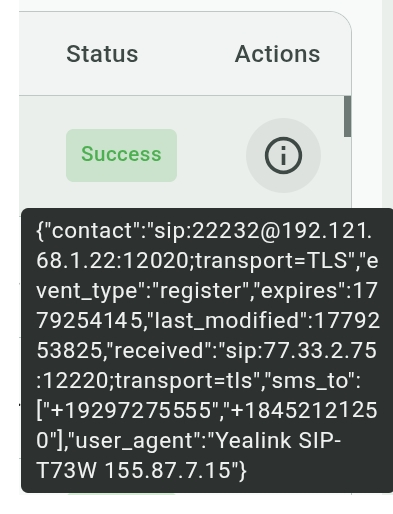
You can click the  icon of a Failed status record to see details or the reason for the failure.

Click the  icon of a record to see the API action that the system used for generating the alert.