- Usage and Access
- Exporting and Copying Contacts
- Tags
- Adding Contacts
- Uploading Contacts
- Contact Card Fields
Usage and Access
The Contacts page is where you create, update, upload, and maintain lists of recipients to be used with the Telebroad Campaigns feature. It is accessed from the side navigation menu under CRM>Contacts.
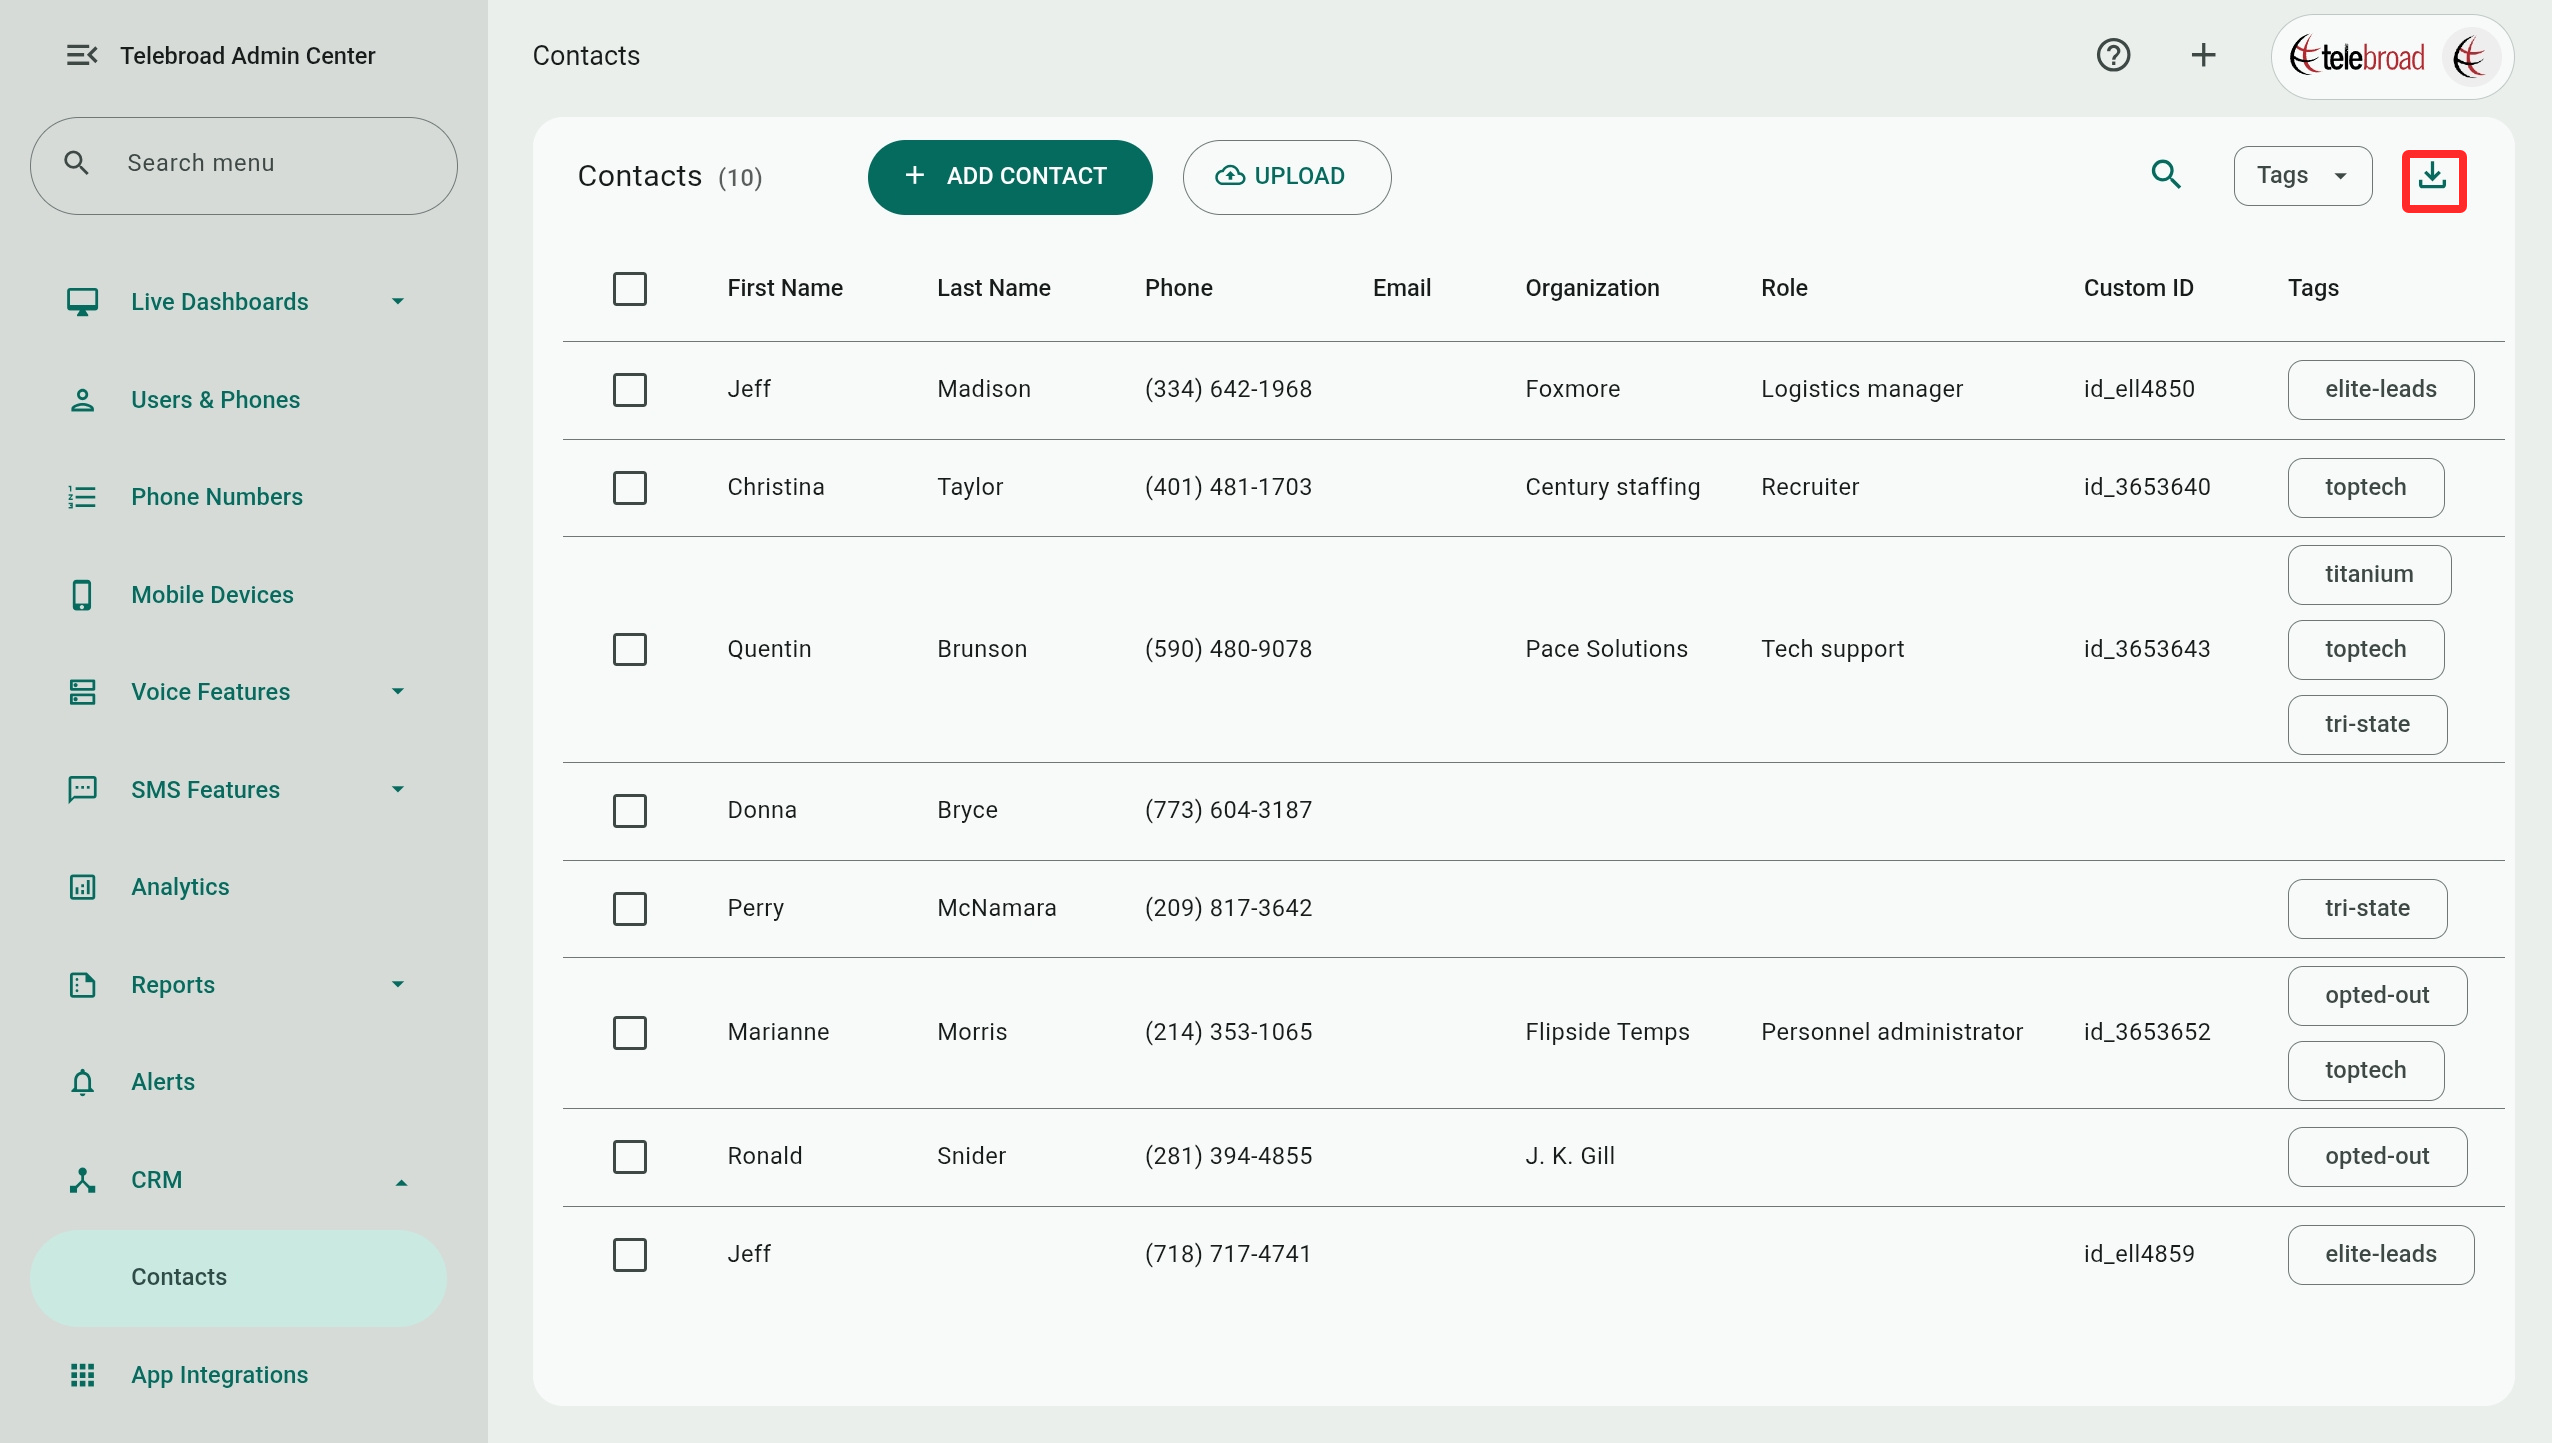
Existing contacts are listed by their First Name, Last Name, Phone, Email, Organization, Role, Custom ID, and Tags (see next).
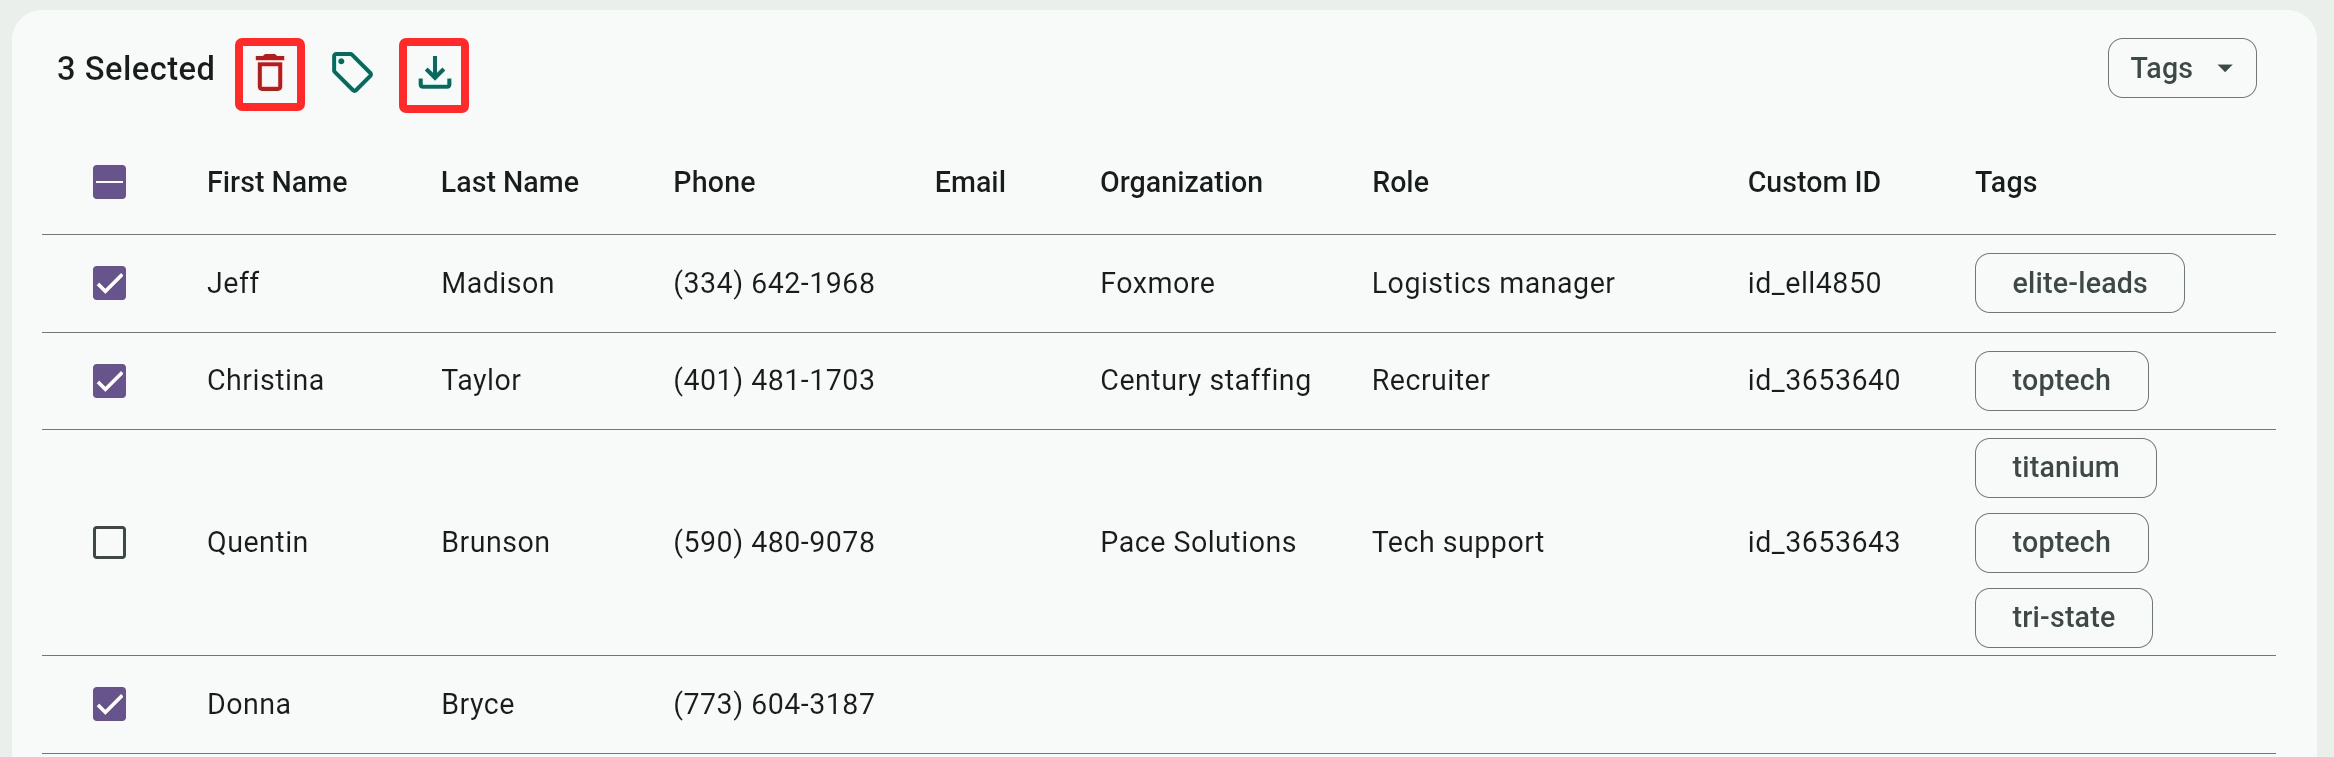
Delete contacts by checking them and clicking  , but be aware that this cannot be undone.
Exporting and Copying Contacts
You can download a CSV file of all existing contacts or only checked contacts with  . This file can be used as a template when you upload new contacts.
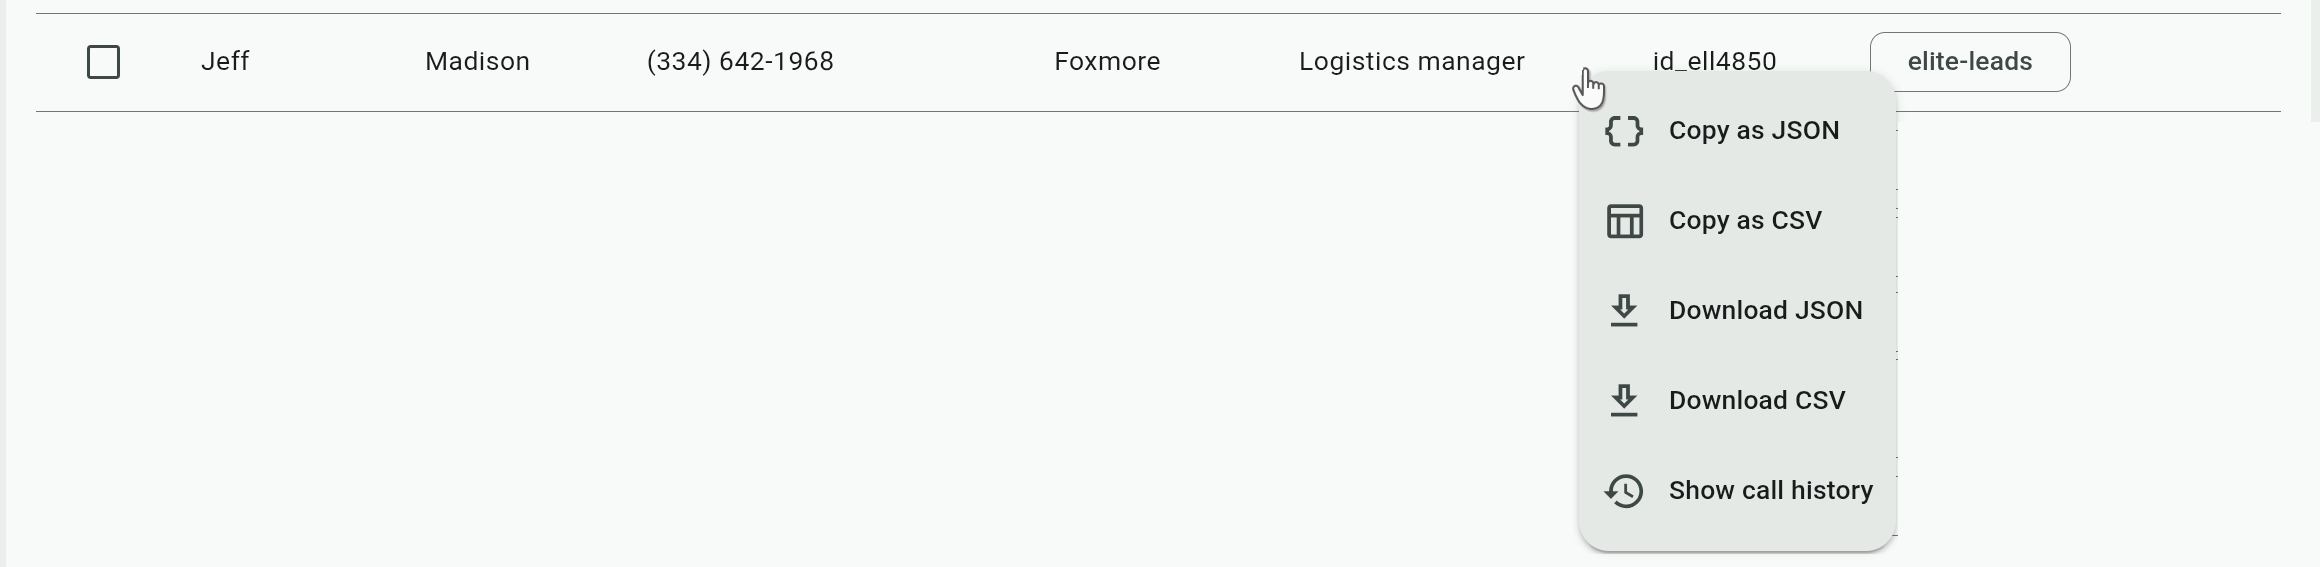
To export or copy individual rows, right-click (or long-press on mobile) any contact and select a quick action to download or copy it in JSON or CSV format.
Contact Call History
Right-clicking or long-pressing a row also gives you the Show call history option. This will take you to the Call History Report page to display all calls for the contact. By default, the date range will show only call history records for "Today", and you should adjust it as needed.
Tags
Tags allow you to organize your contacts by groups or categories. Examples include tags to identify a campaign's lead source or referring agency, state or geographical location, industry, responsible agent or product manager, etc.
You can also create a tag category to recognize and group customers who opted out of receiving SMS messages.
Filtering Contacts by Tags
Use the Tags menu to filter the contacts list and display contacts that have any of the checked tags. You can also filter to show Contacts with no tag.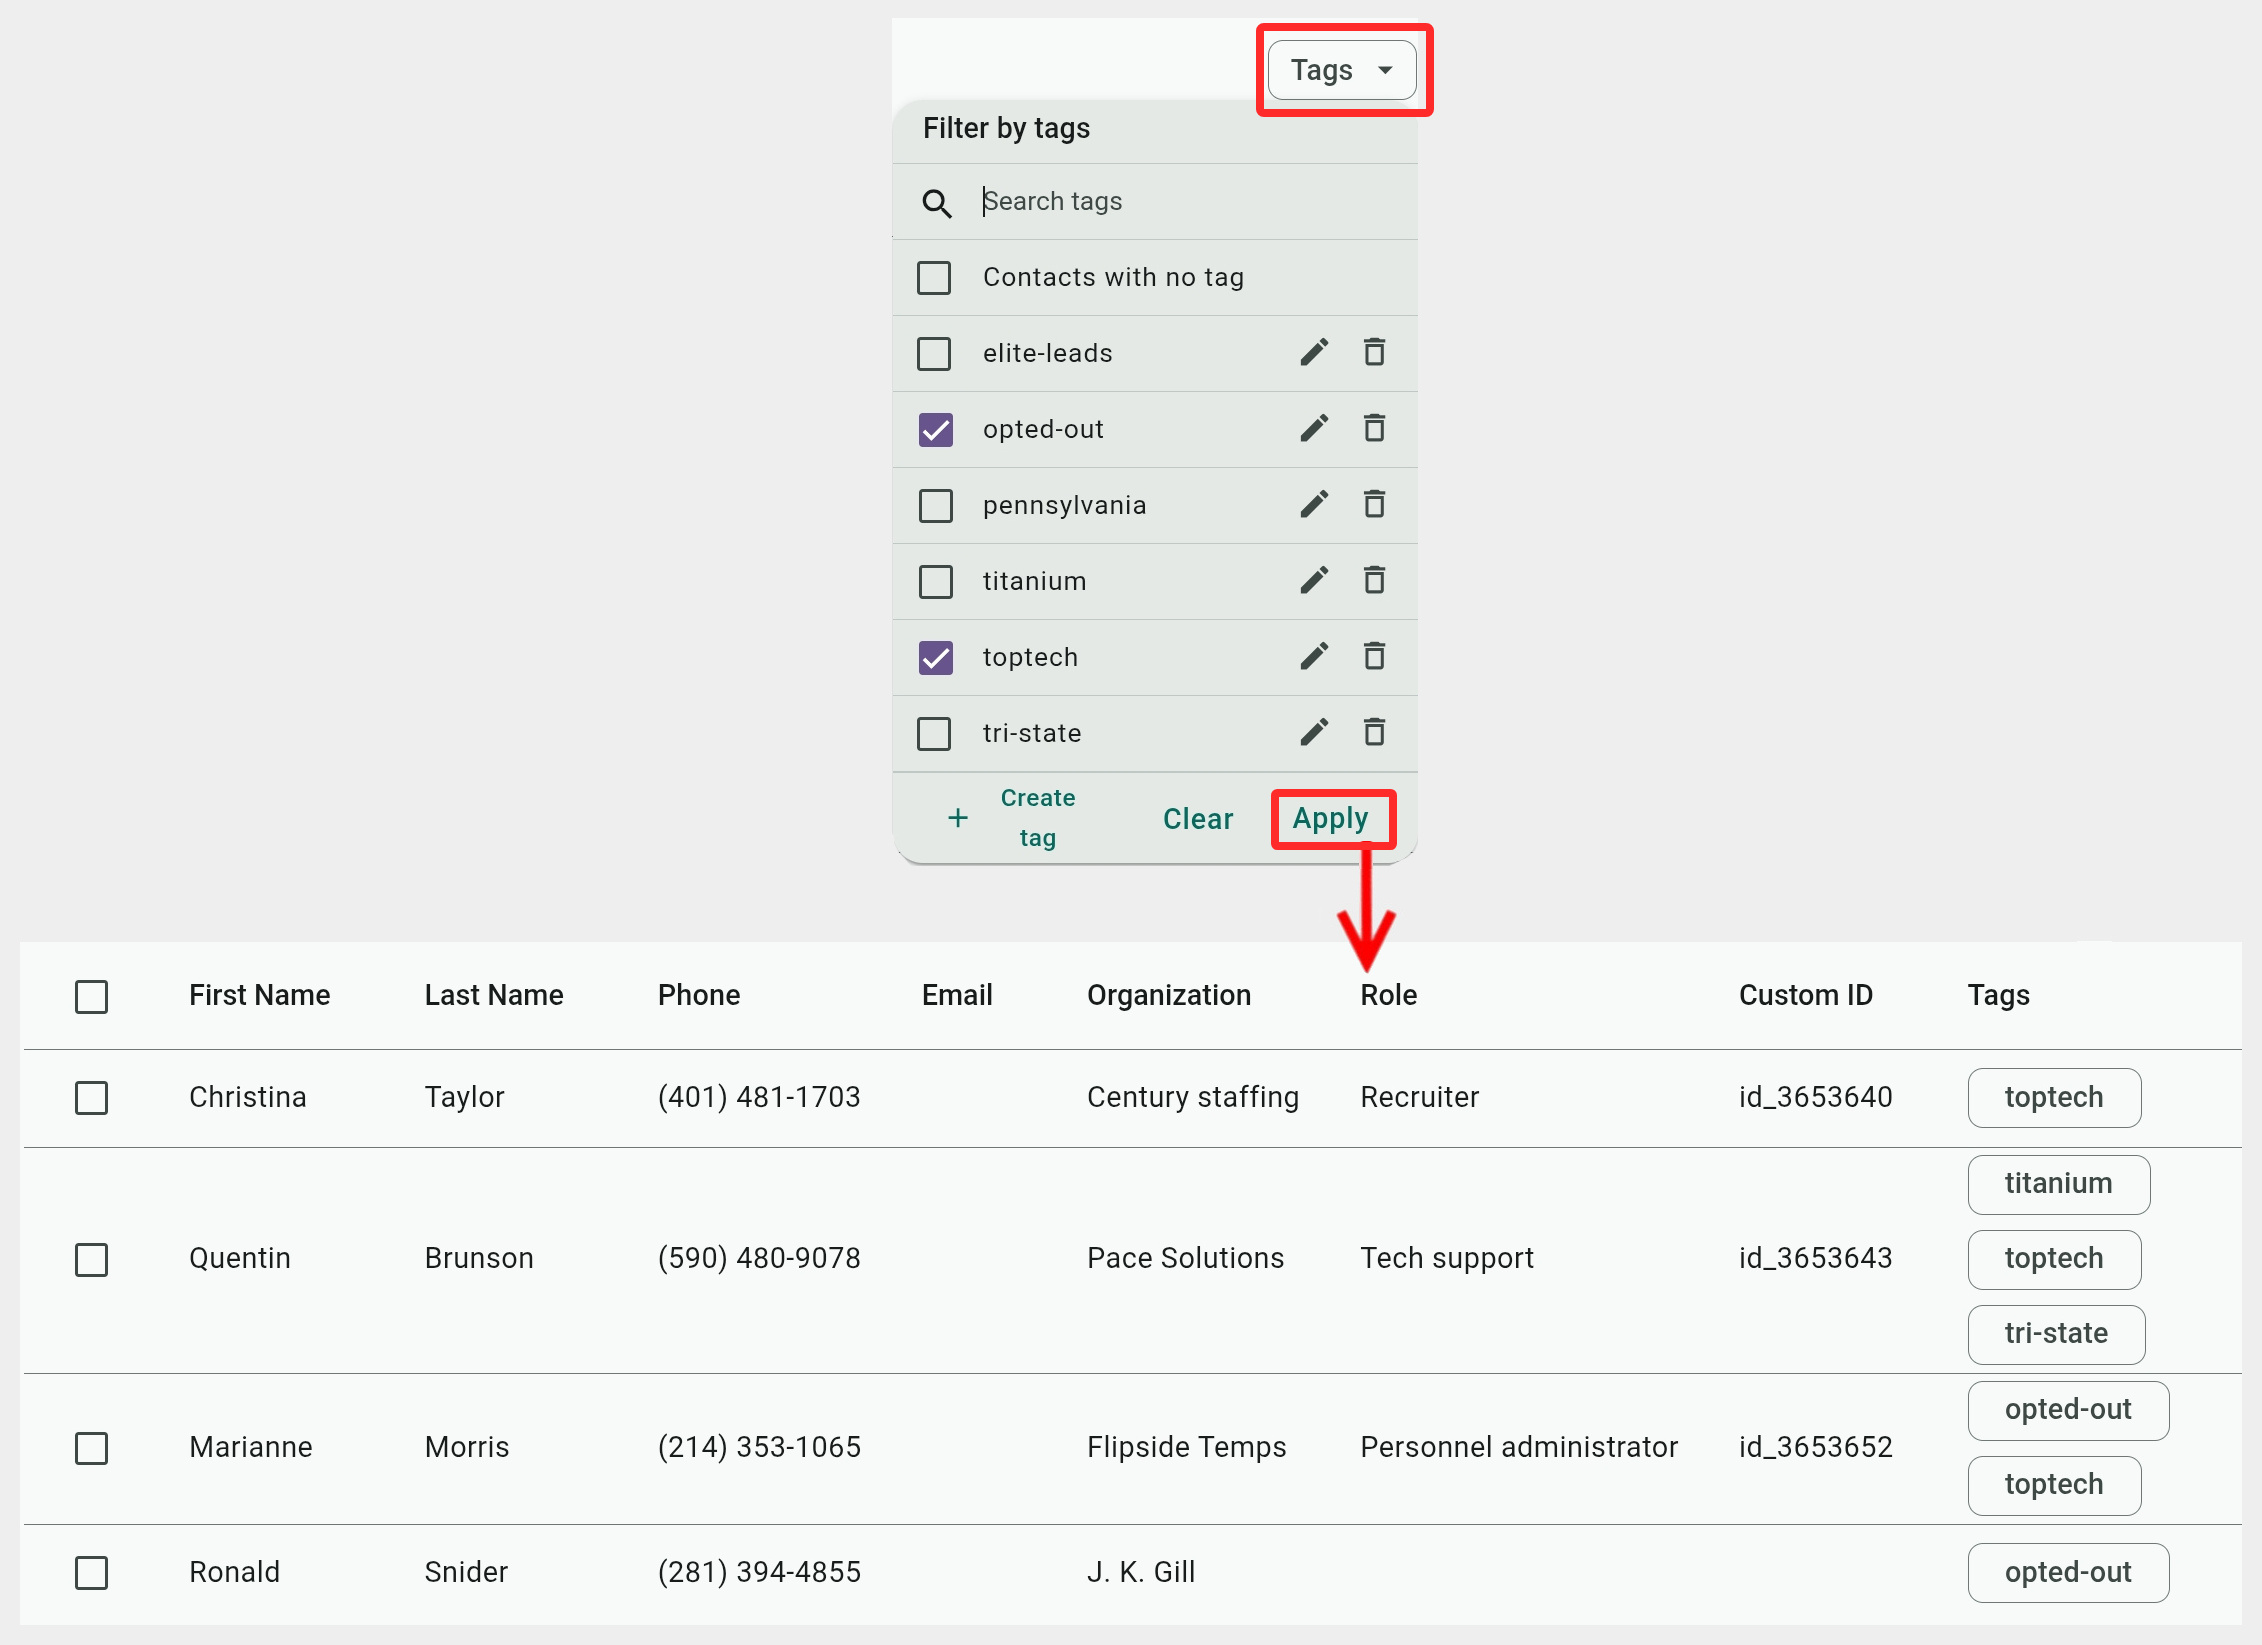
Managing and Creating Tags
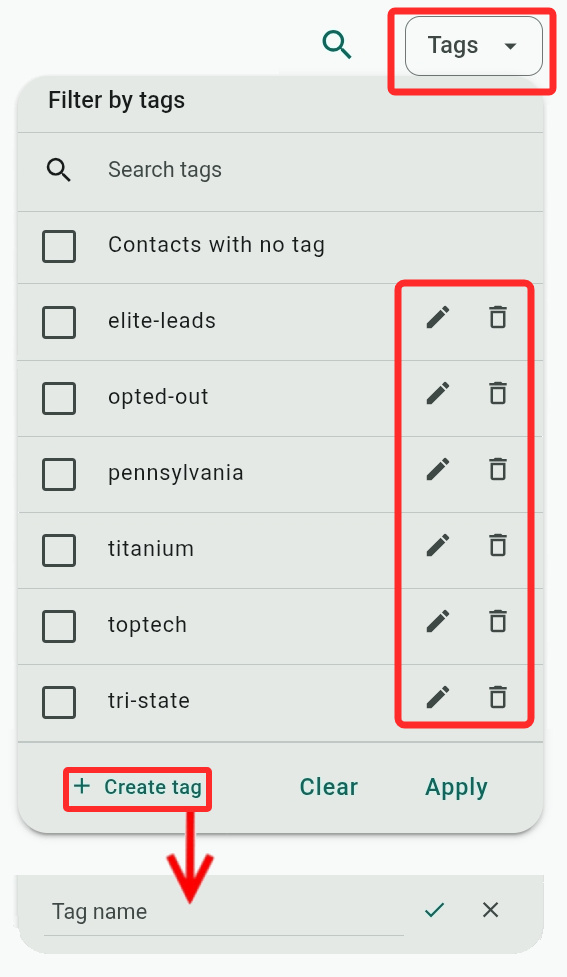
Manage your tags in the Tags menu, using  to delete or
  to rename existing tags (you do not need to select a tag for this since selecting tags is used for filtering).
When you Create tag, you just need to provide its name. You can also create new tags when editing or adding a new contact or by uploading contacts that have new tags.
Assigning Tags
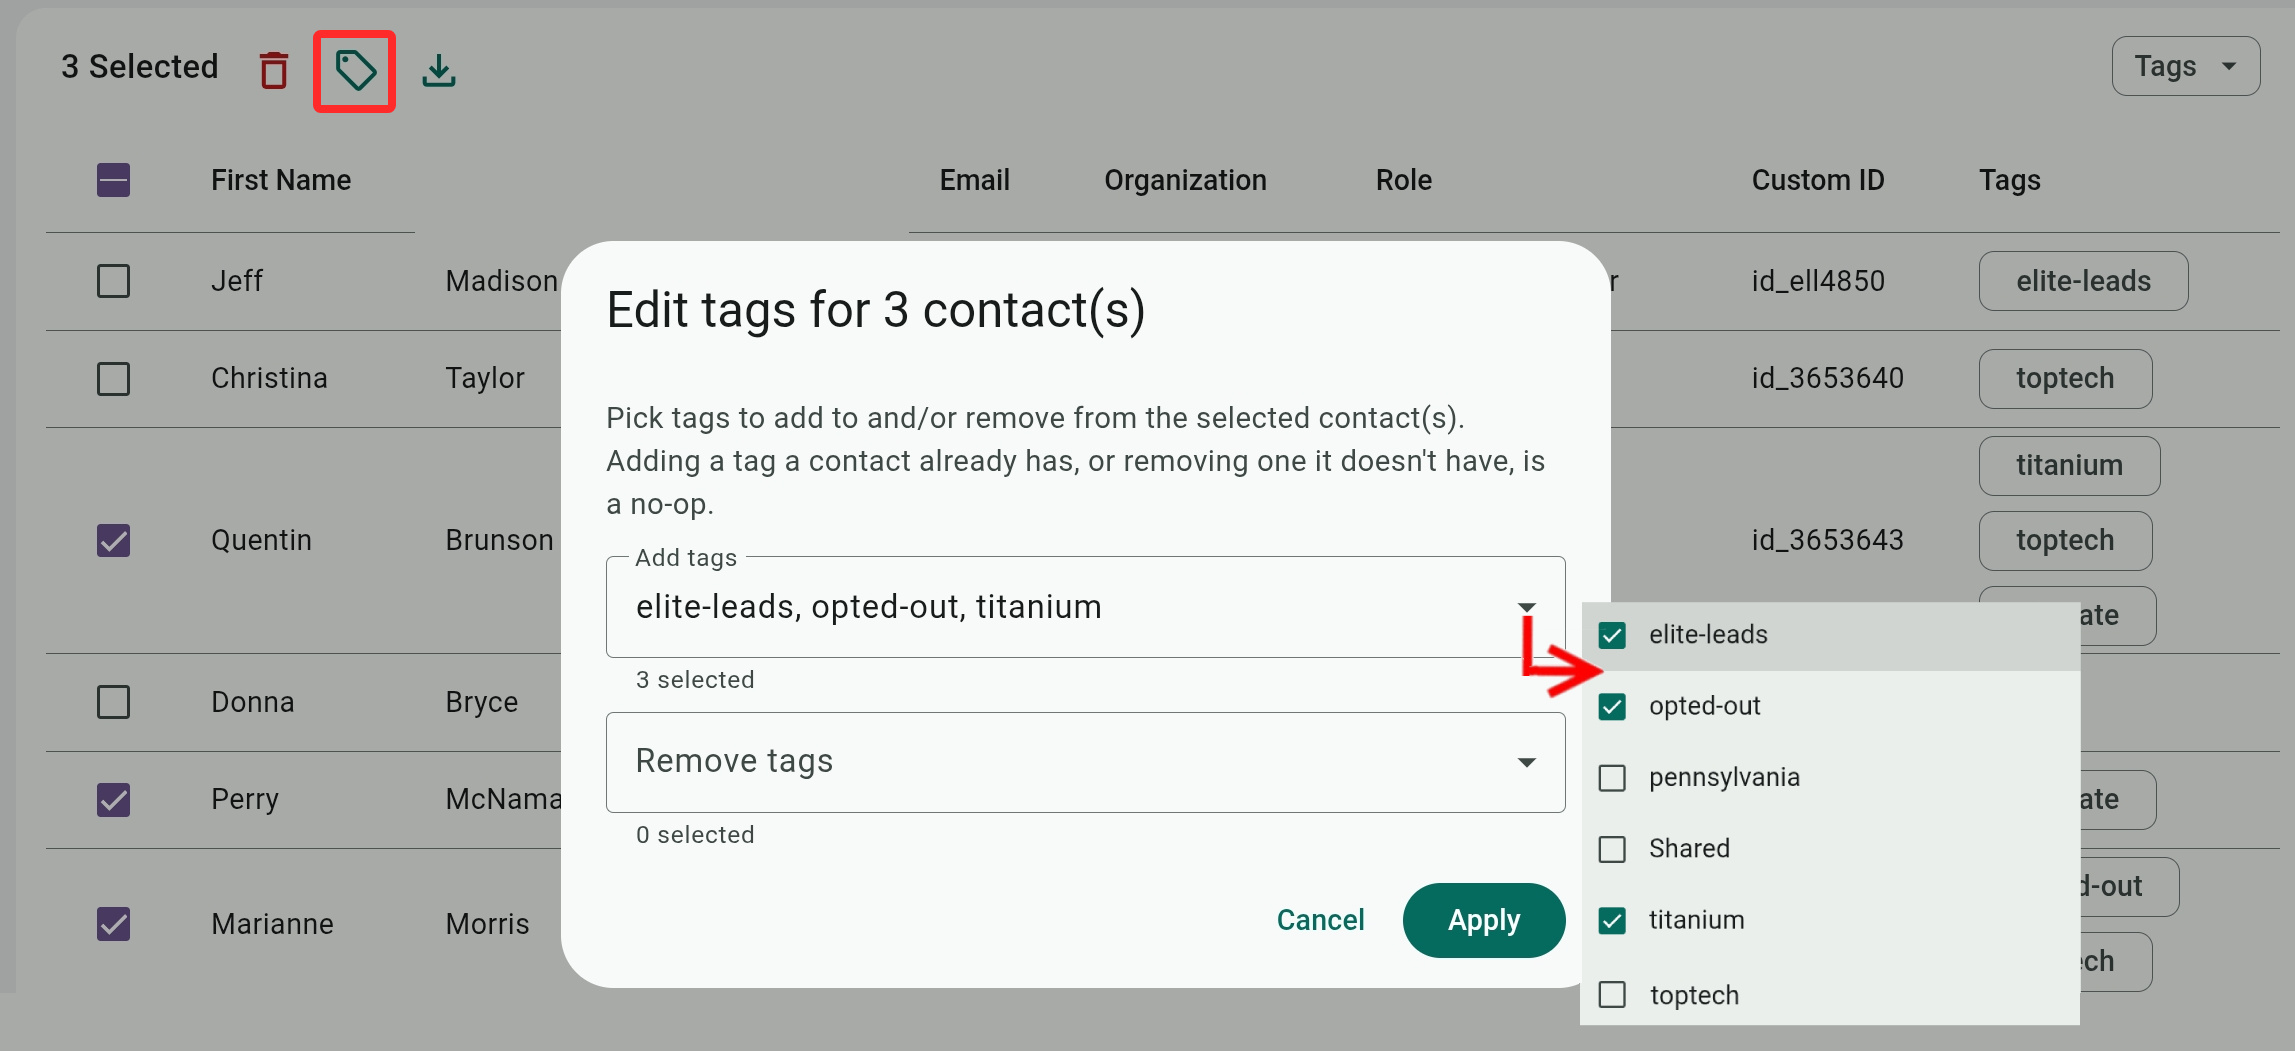
You can assign tags to multiple contacts by checking them, clicking  , and selecting tags to add or remove.
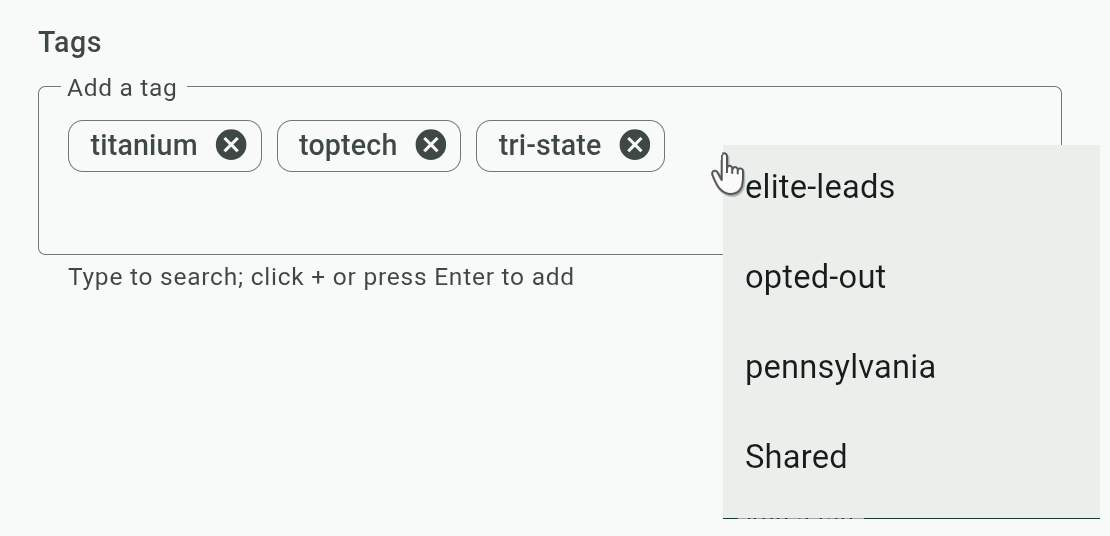
Tags can also be assigned and unassigned to a single contact by opening it and clicking in the Tags box to select from a list of tags that have not been assigned to the contact or clicking X to remove tags.
Adding Contacts
Add new contacts manually with the ADD CONTACT button. The First name, Last name, and at least one Phone Number fields are required. See full explanation of the fields below.
You can also add contacts from the Call History page.
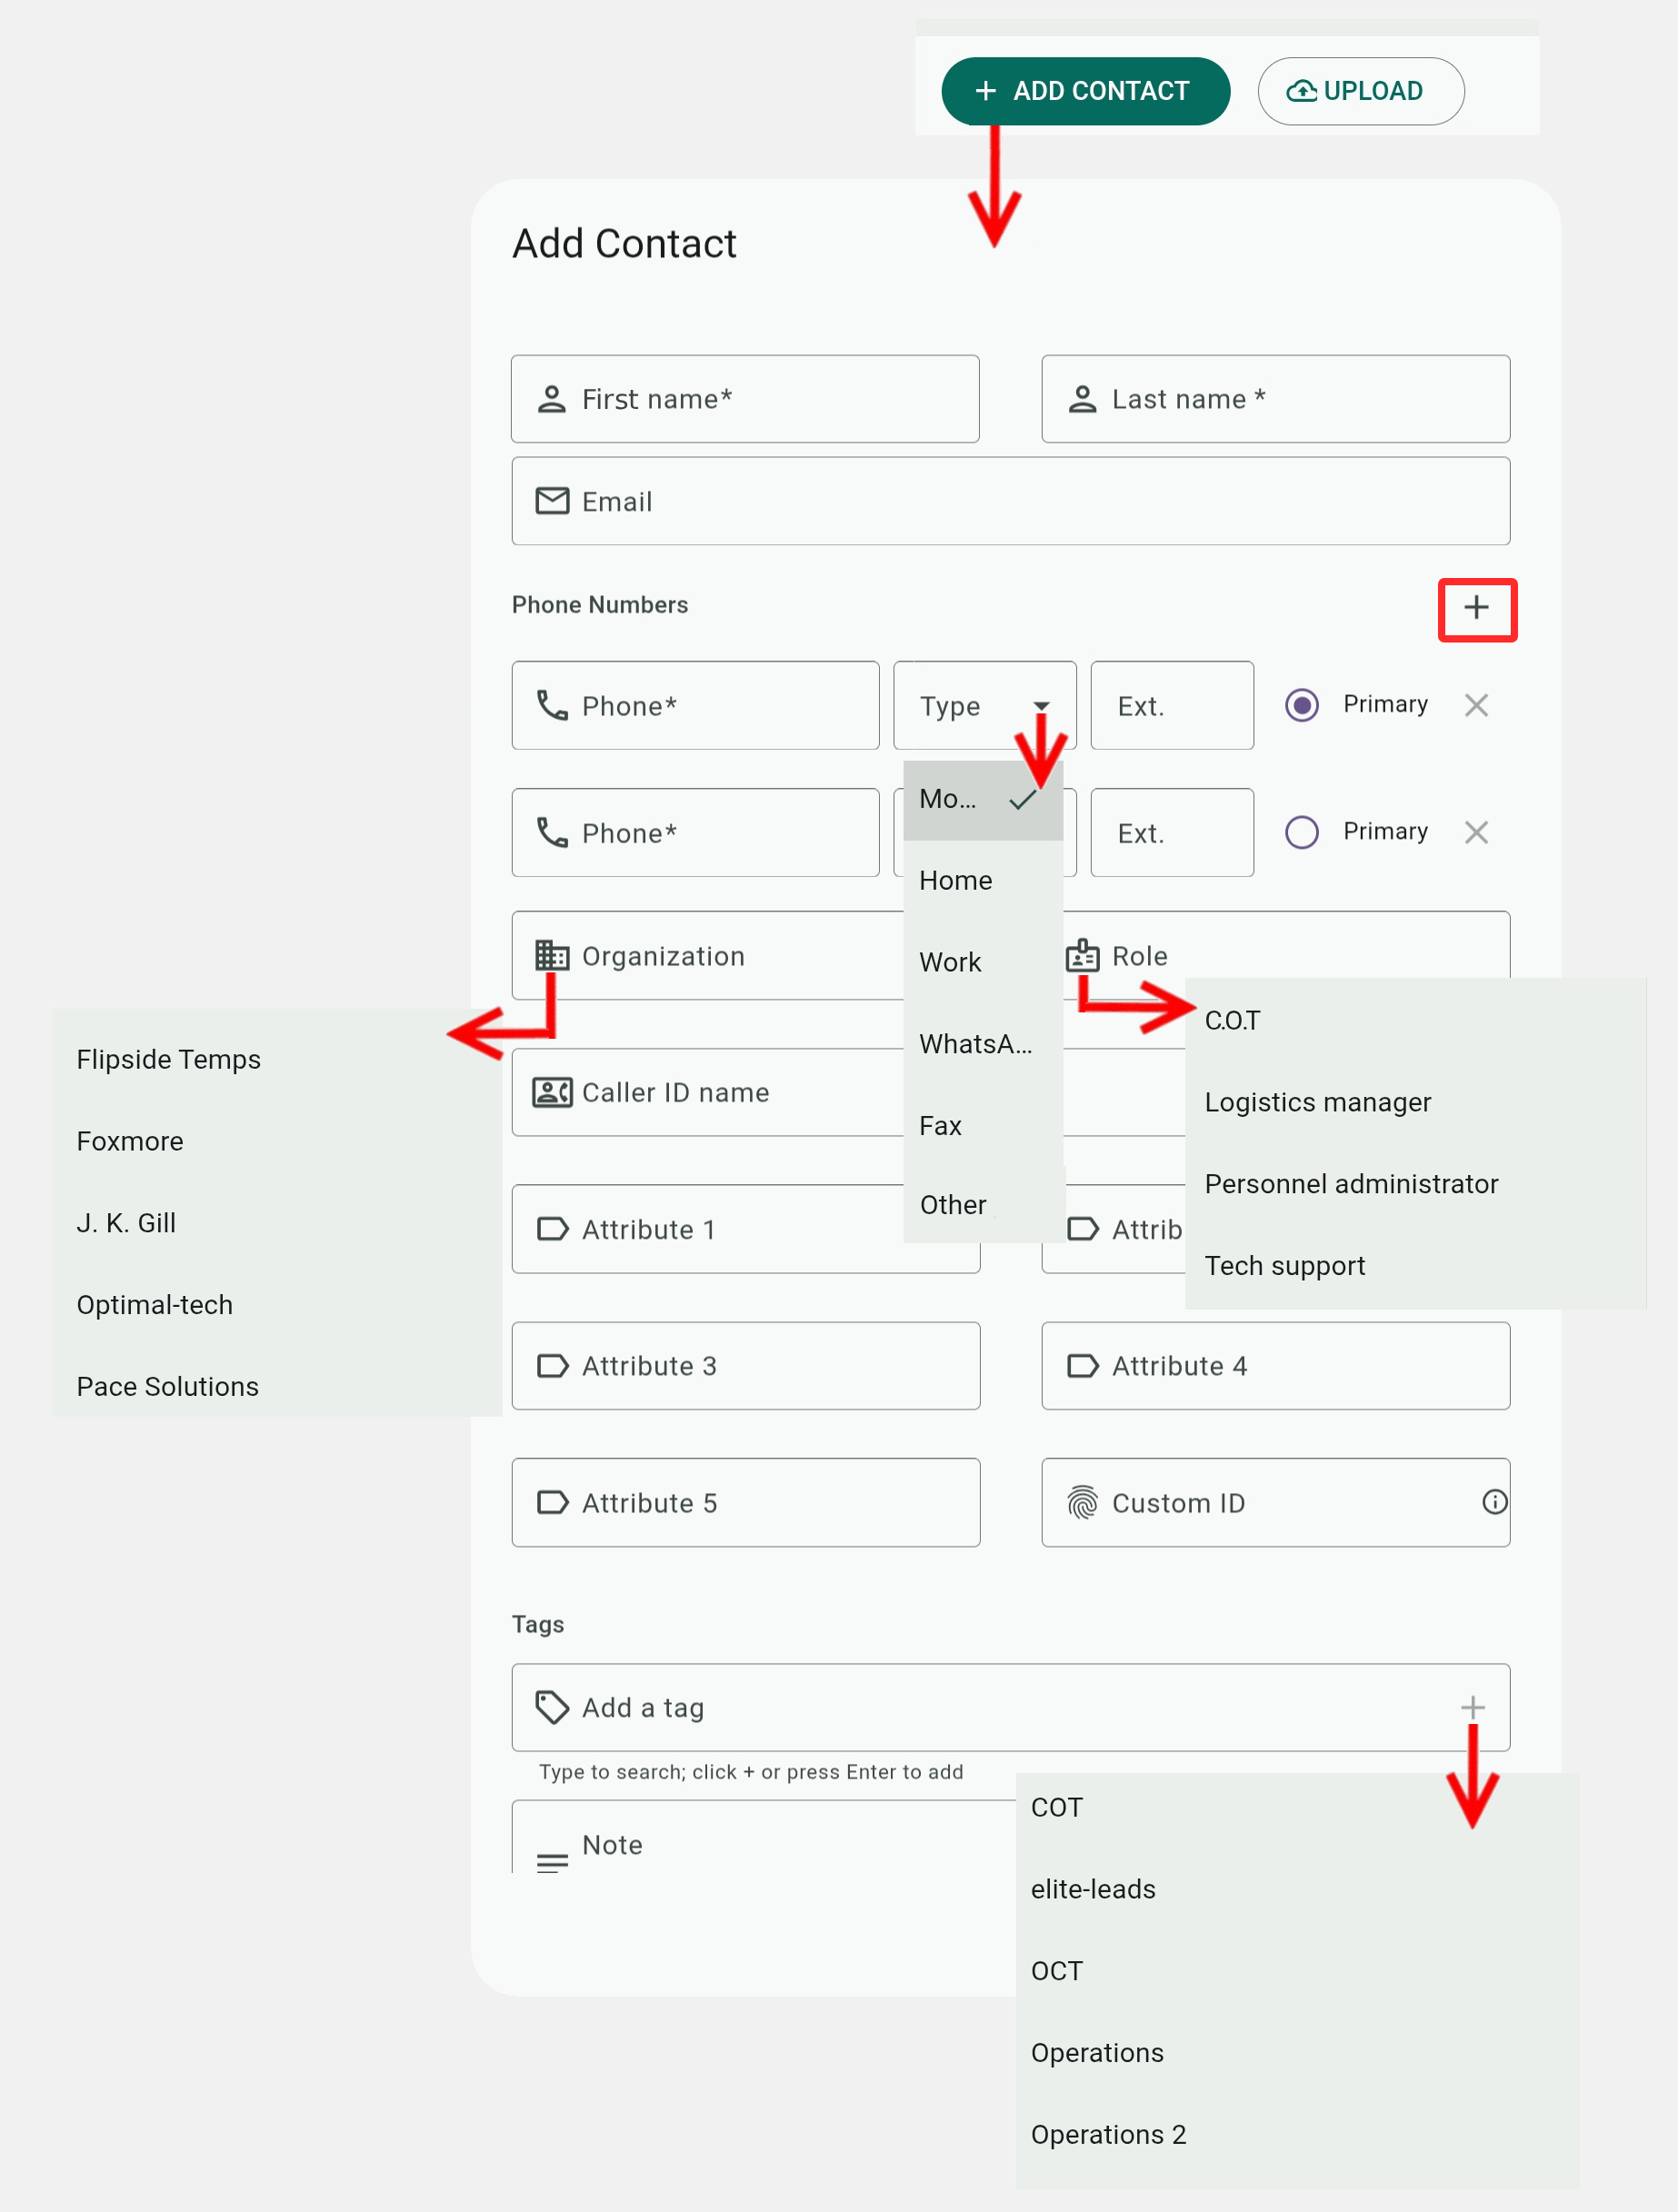
You can add ( ) multiple phone numbers to the contact and assign them a different Type of number, like Home, Work, WhatsApp, etc.
Type in the Organization and Role fields to enter new values or look for matches with existing values. Click these fields to show and select from values already in your account.
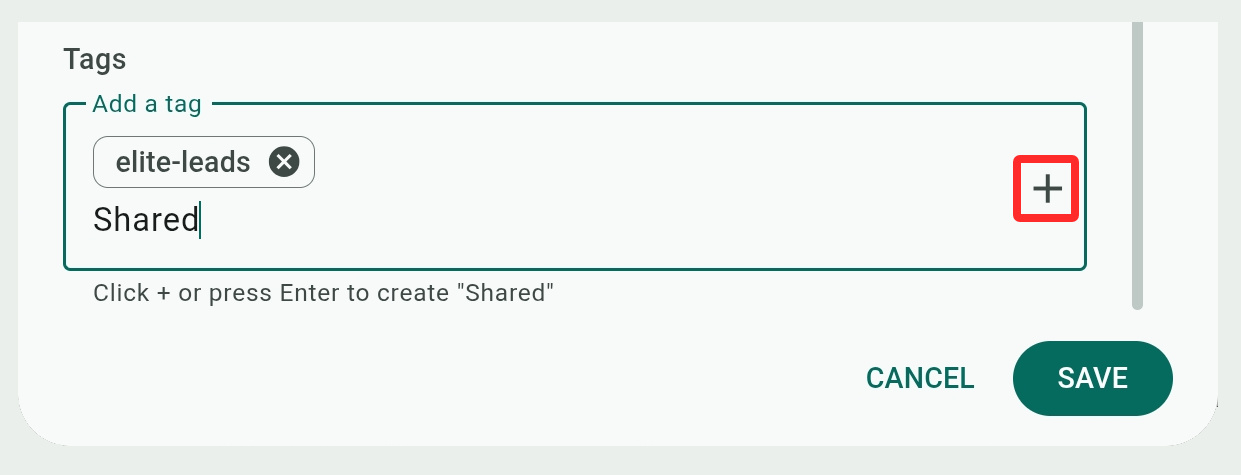
Similarly, click in the Tag box to show a list of existing tags that you can assign to the contact. You can also type in the box to look for matching results, or enter a new tag and click  or press Enter to save it.
Uploading Contacts
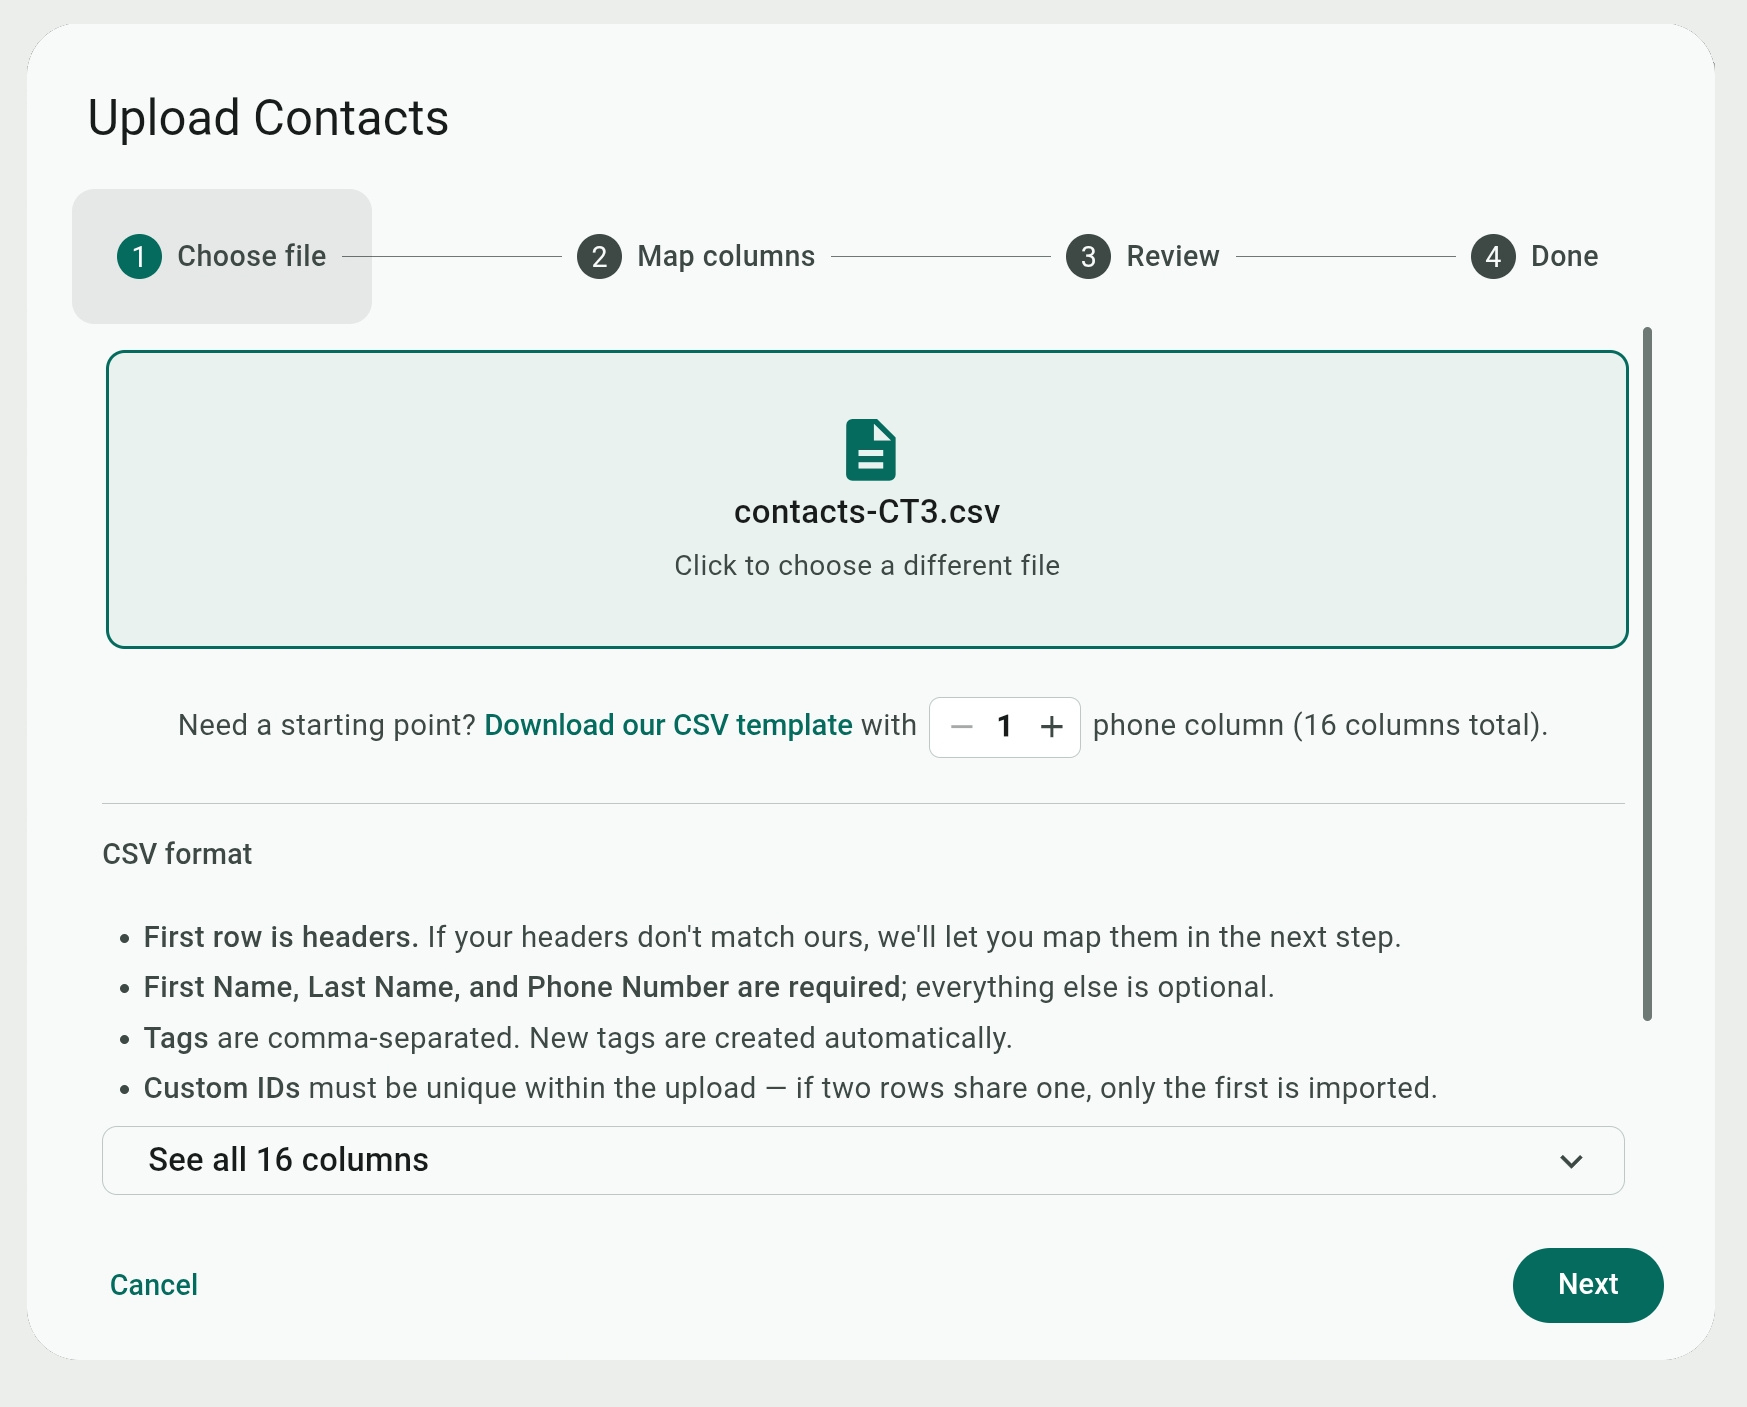
Use the Upload button to import contacts using an import wizard. Supported file formats include CSV, TSV, XLS, and XLSX.
The file is expected to have certain columns that follow the contact template, but you can remap columns (see next) to ensure they are uploaded correctly.
The Tags column can accept multiple comma-separated items.
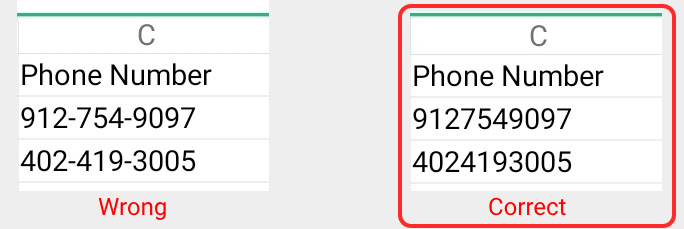
Phone numbers have to follow a ten-digit format and not include any hyphens or other symbols.
To see the required columns, you can expand the See all 16 columns list in the upload dialog (the number of columns depends on the number of phone numbers selected).
To get a working template, you can export your existing contacts or click the Download our CSV template in the upload dialog. The template can be generated with additional phone numbers, as needed. Each additional phone number will add three columns – a Phone Number, a Phone Type, and a Phone Extension.
Mapping Columns of Uploaded Files
After you select your contact file and click Next, the system will try to match columns from your file (by their headings) to the expected template fields.
If all columns match the template, you will be prompted to skip to step 3.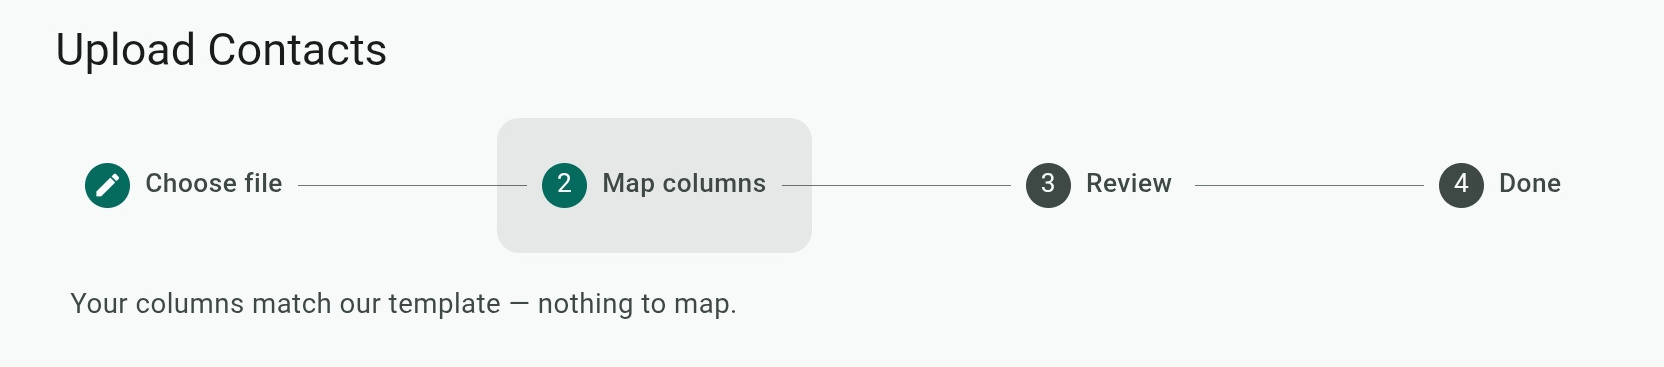
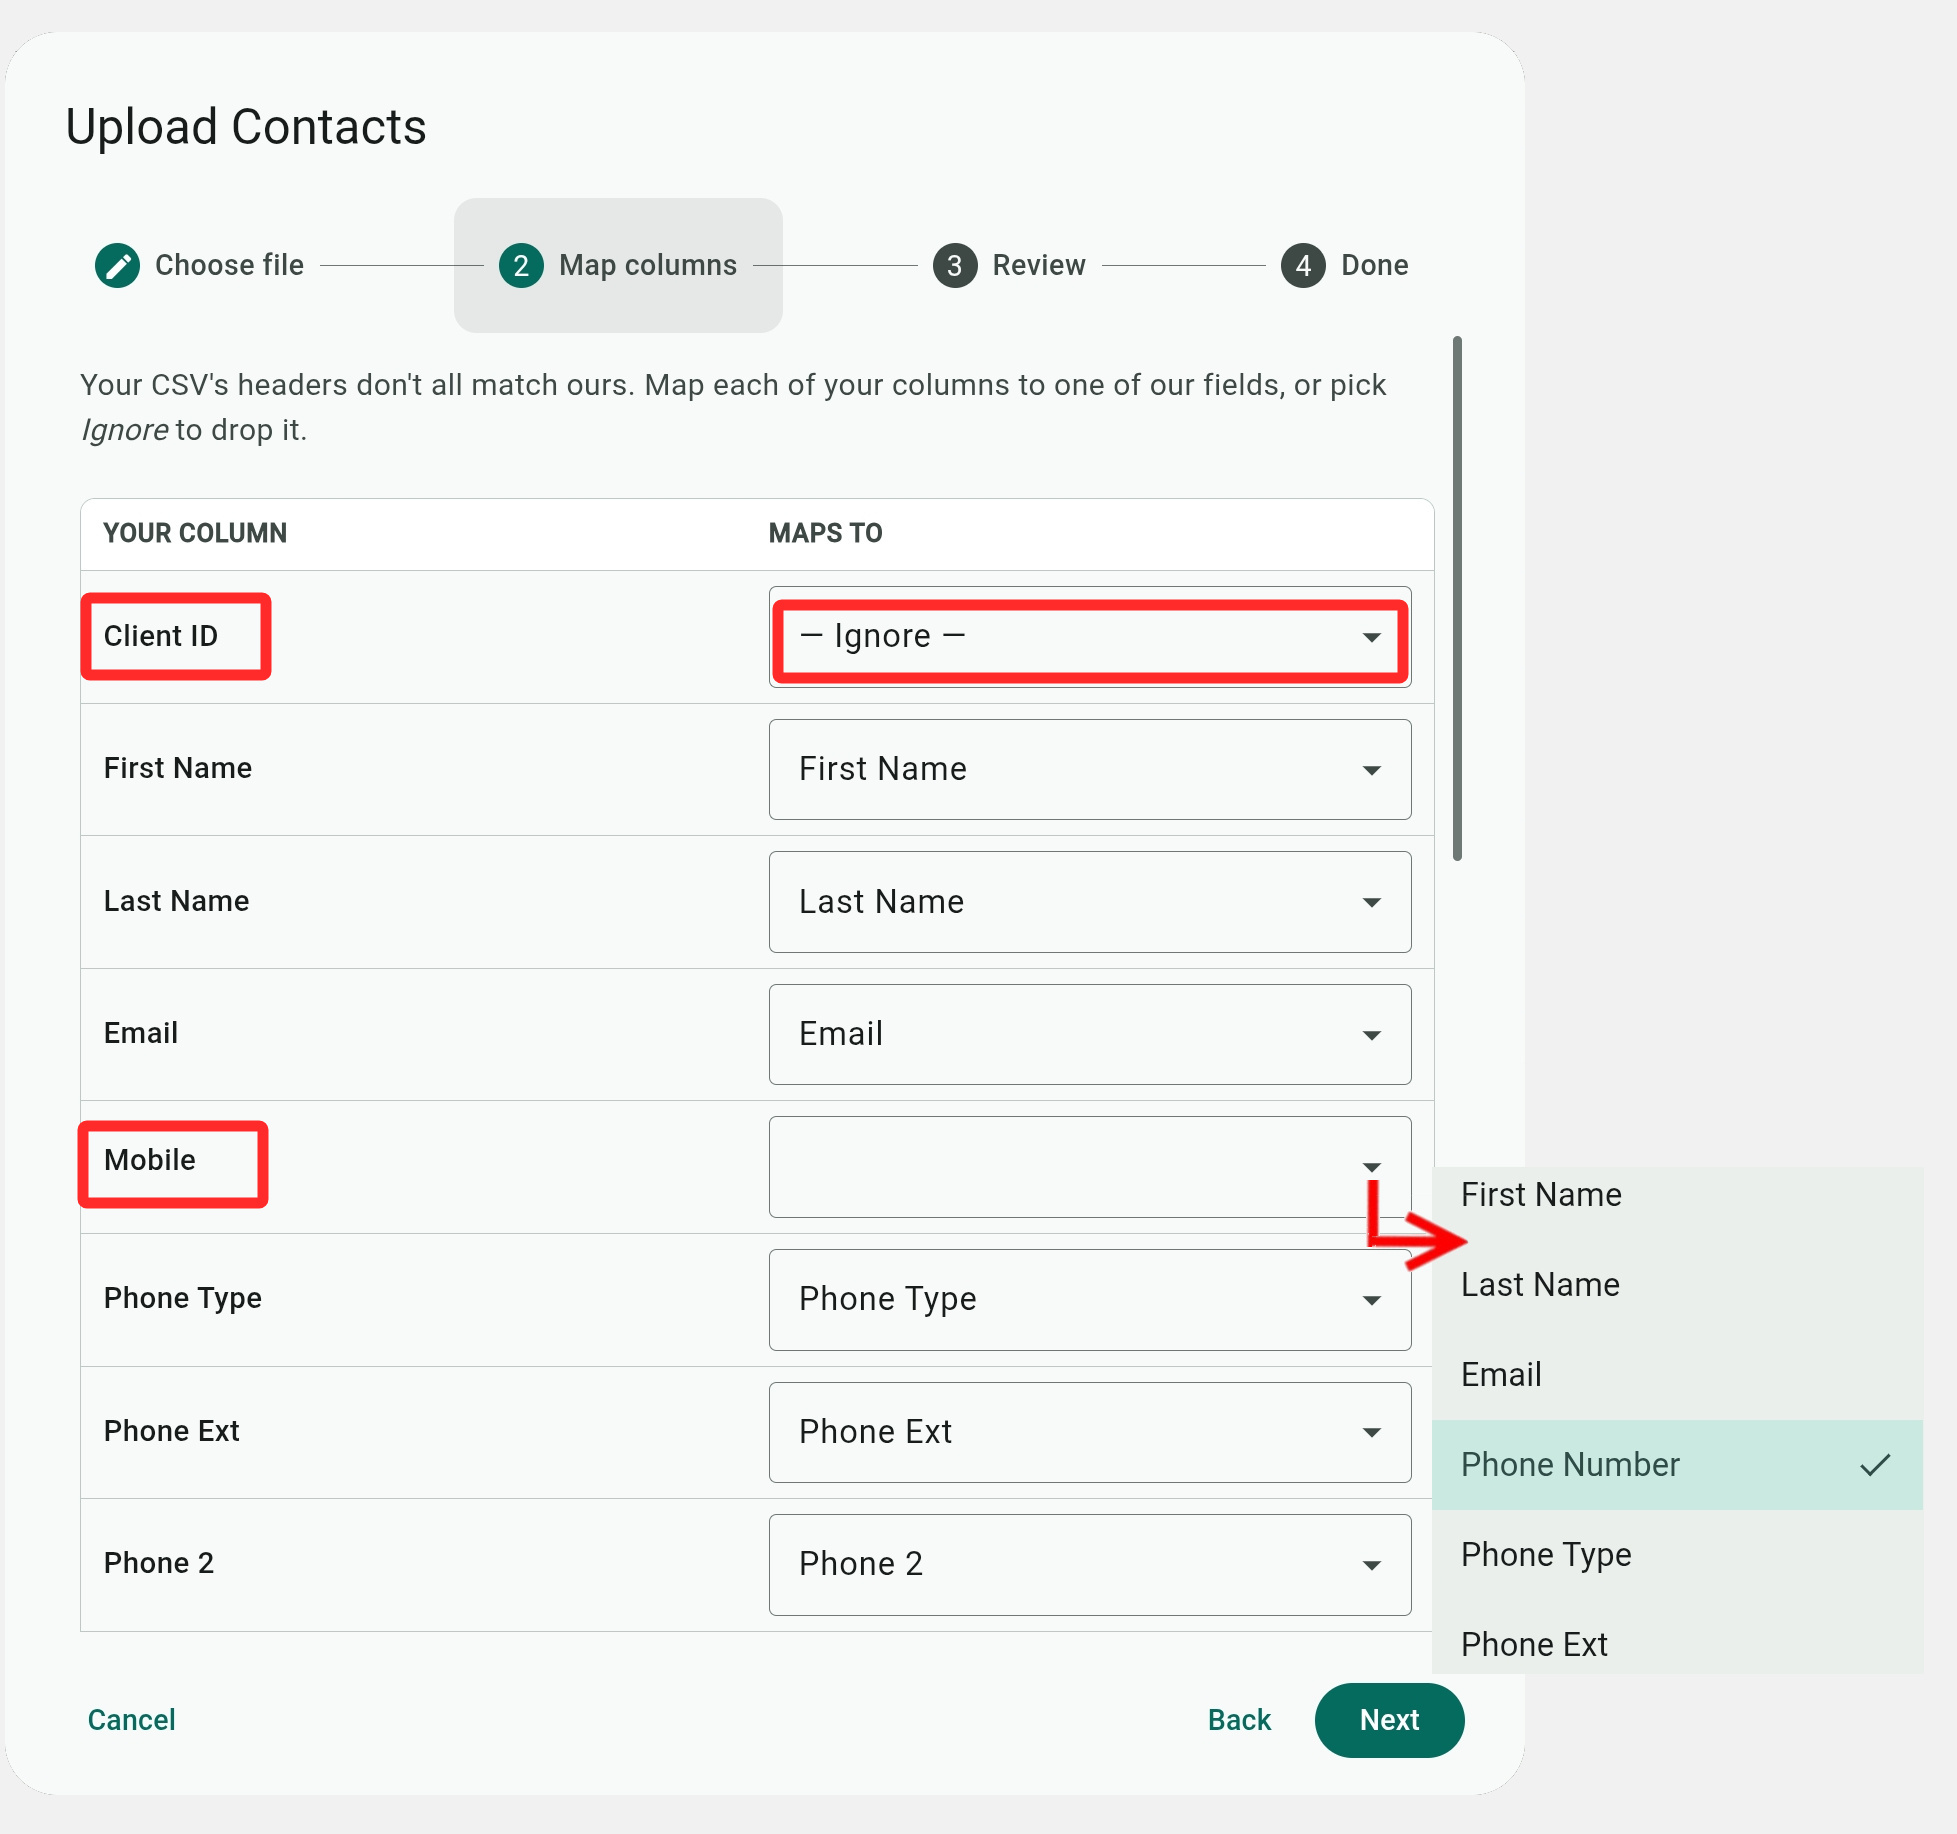
Otherwise, the Map columns tab will show columns that were not matched as blank, and you can select the correct field to map them to, or select to Ignore them.
For example, you can see that the uploaded file has a redundant "Client ID" column that we ignored. It also has a "Mobile" column containing phone numbers that the system could not match automatically, but we can map it to the "Phone Number" column.
Each column from your file can only be mapped to one template field, except for the Tags field (see next).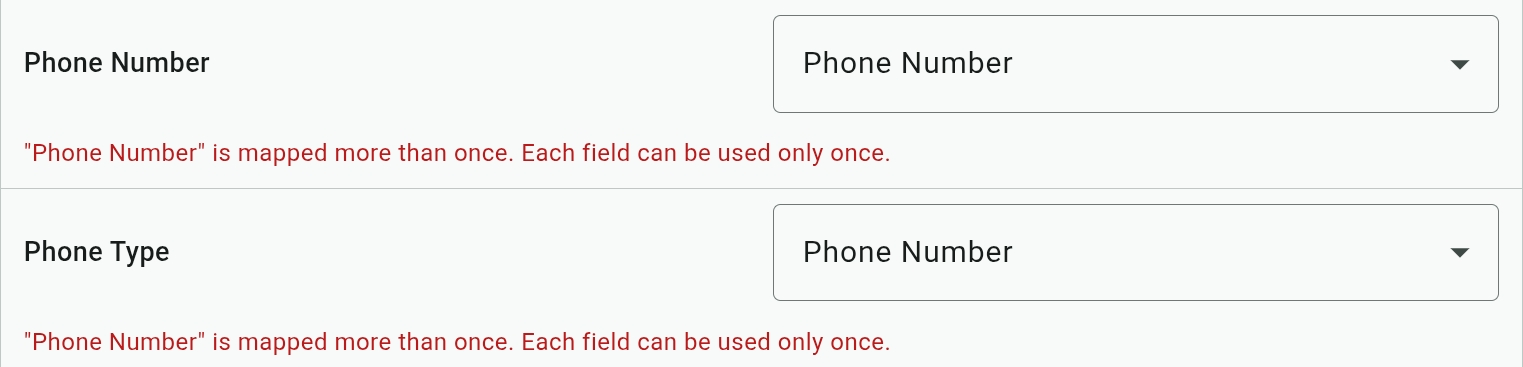
Mapping Tags
Tags are the one exception for mapping, as the system allows you to map multiple columns from your file as tags.
The system also recognizes comma-separated values for mapped tag fields and will treat each value as a separate tag.
The list of tags will be updated with any new tags from the uploaded contact file. You may need to refresh your browser to see these.

Reviewing and Confirming Uploads
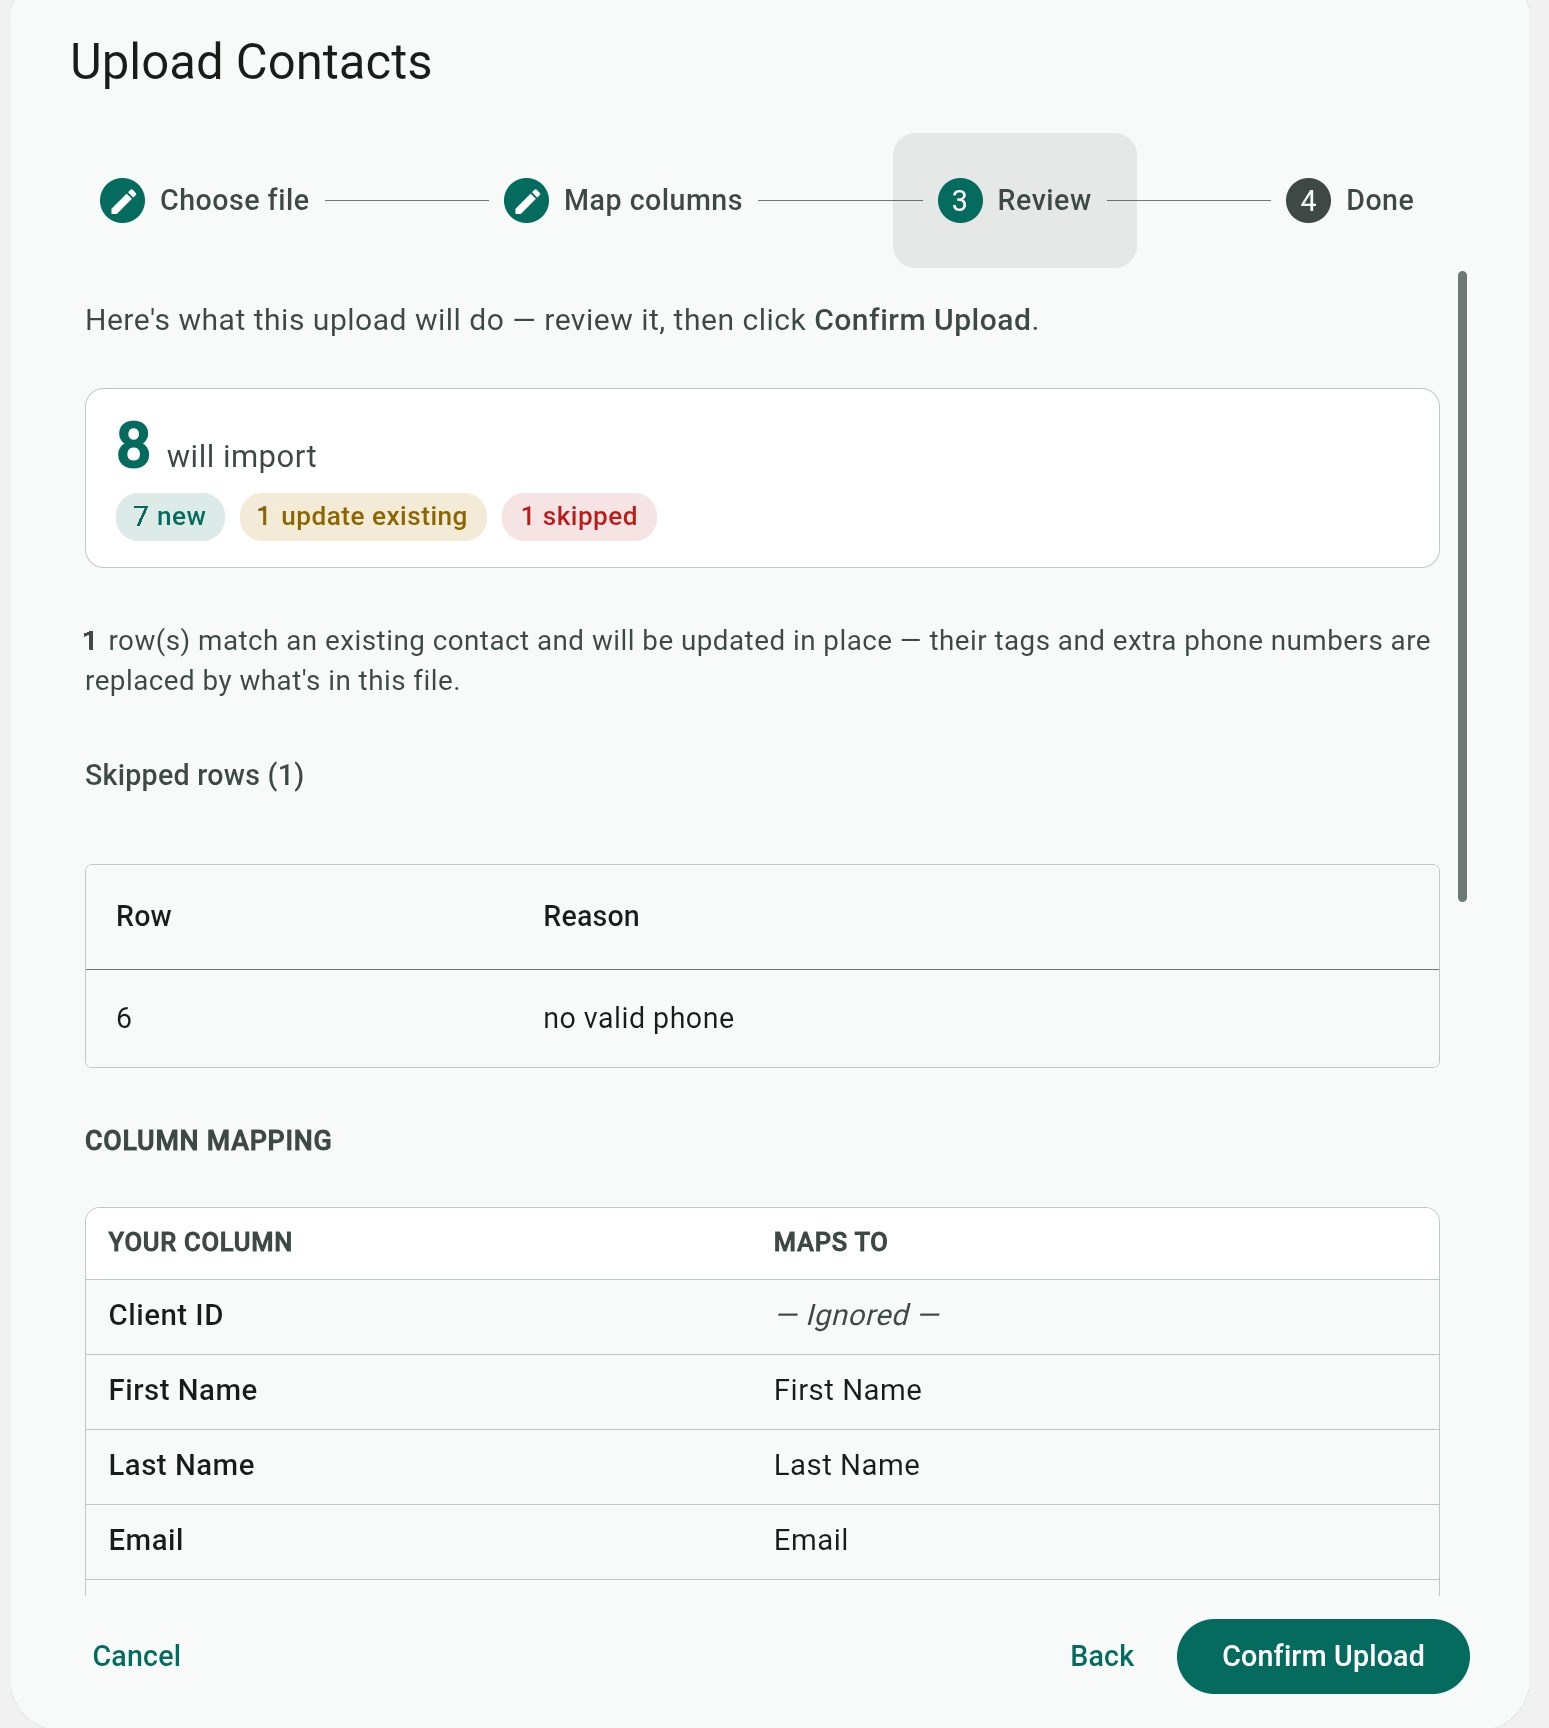
The system will show a review before you Confirm (the) Upload, listing new contacts that will be added, existing contacts that will be updated, and contacts from the file that will be skipped with the reason why they can't be uploaded.
Contact Card Fields
Select a contact or create a new contact to see and edit their contact card fields.
Because contacts are used for SMS campaigns, the Phone Number, First Name, and Last Name fields are required. Naturally, the phone number needs to be a mobile-compatible number (not a landline).
The following figure (from the contact upload dialog) explains the fields. You can have multiple phone numbers, each with its own number, type, and extension. Tags are discussed above, and attributes are explained next.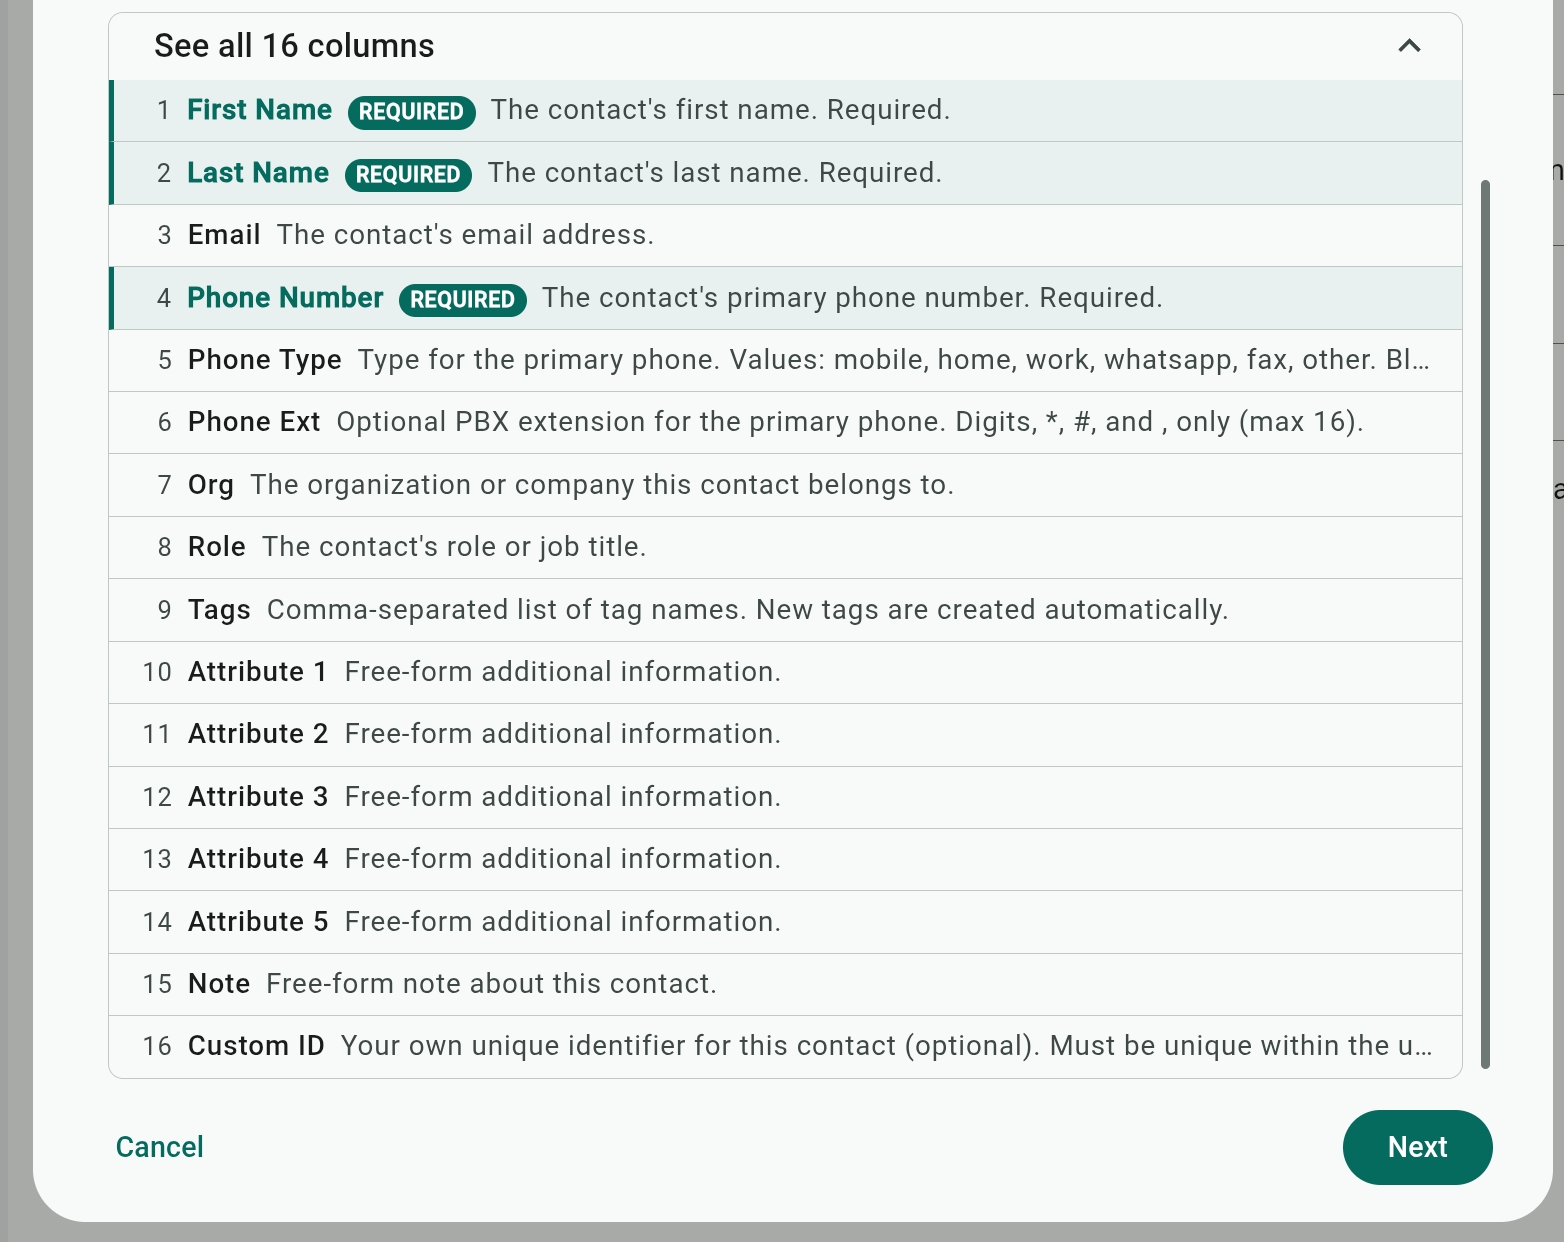
Contact Attributes and Placeholders
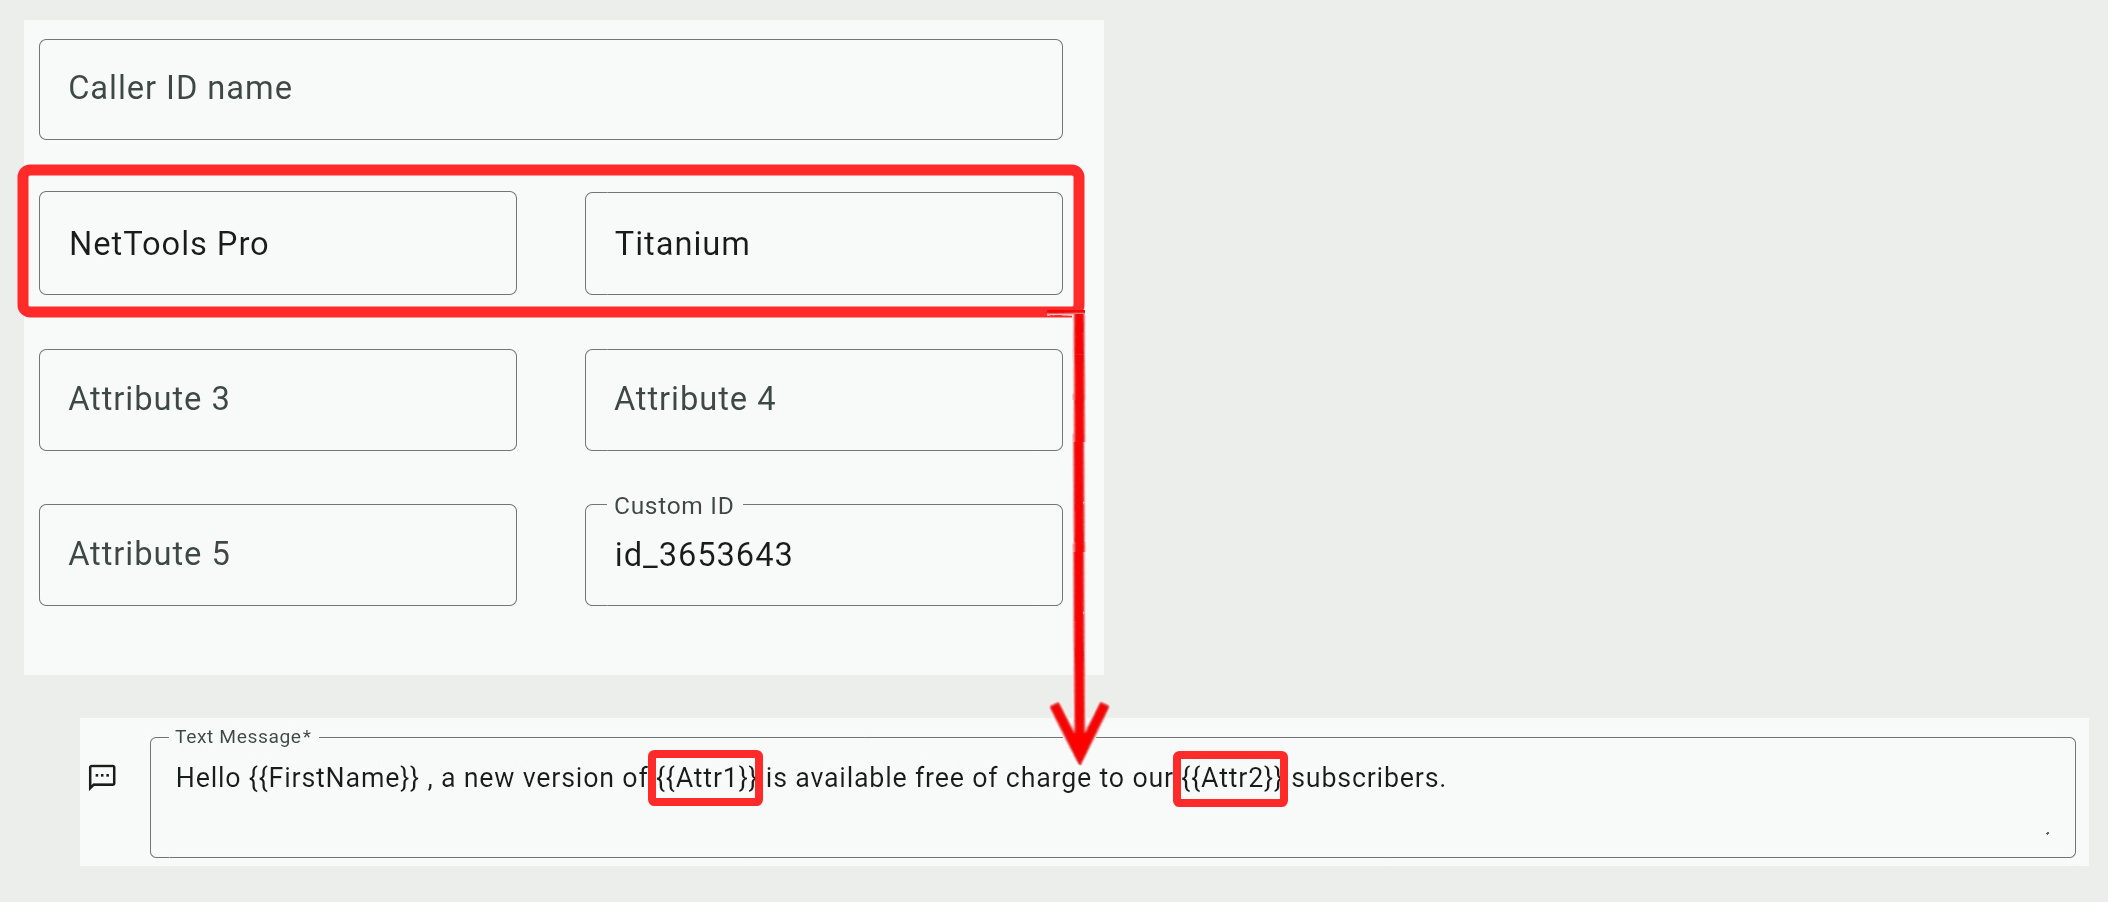
In the attribute fields, you can enter any contact details, features, or characteristics to better define the recipient and offer them more personalized messages using SMS campaign placeholders.
For example, a software company can use attribute fields to track the type of software and subscription that its clients purchased. Then it can deliver personalized messages about software updates or promotions based on the subscription level.